If you follow me on Instagram, then you DEFINITELY know that this ”how to paint tile floors tutorial has been coming! I have been painting the kids bathroom floors for the past couple of weeks, and you guys, the outcome was better than I expected!
This post contains affiliate links
As we work our way through our house, I knew I wanted to set out to do a quick, inexpensive update for another room that I would share with my amazing followers. One of the projects on my list was to update the flooring in our kids bathroom that I didn’t love. So today, I am going to share with you all how to paint tile floors so you can also update your flooring in your home that you might not love but don’t want to replace entirely.
Check out the fully updated bathroom here!
How to Paint Tile Floors
For us, when we decided we wanted to update the kids bathroom, we knew that we didn’t want to put the amount of money into the room that new tile would take.
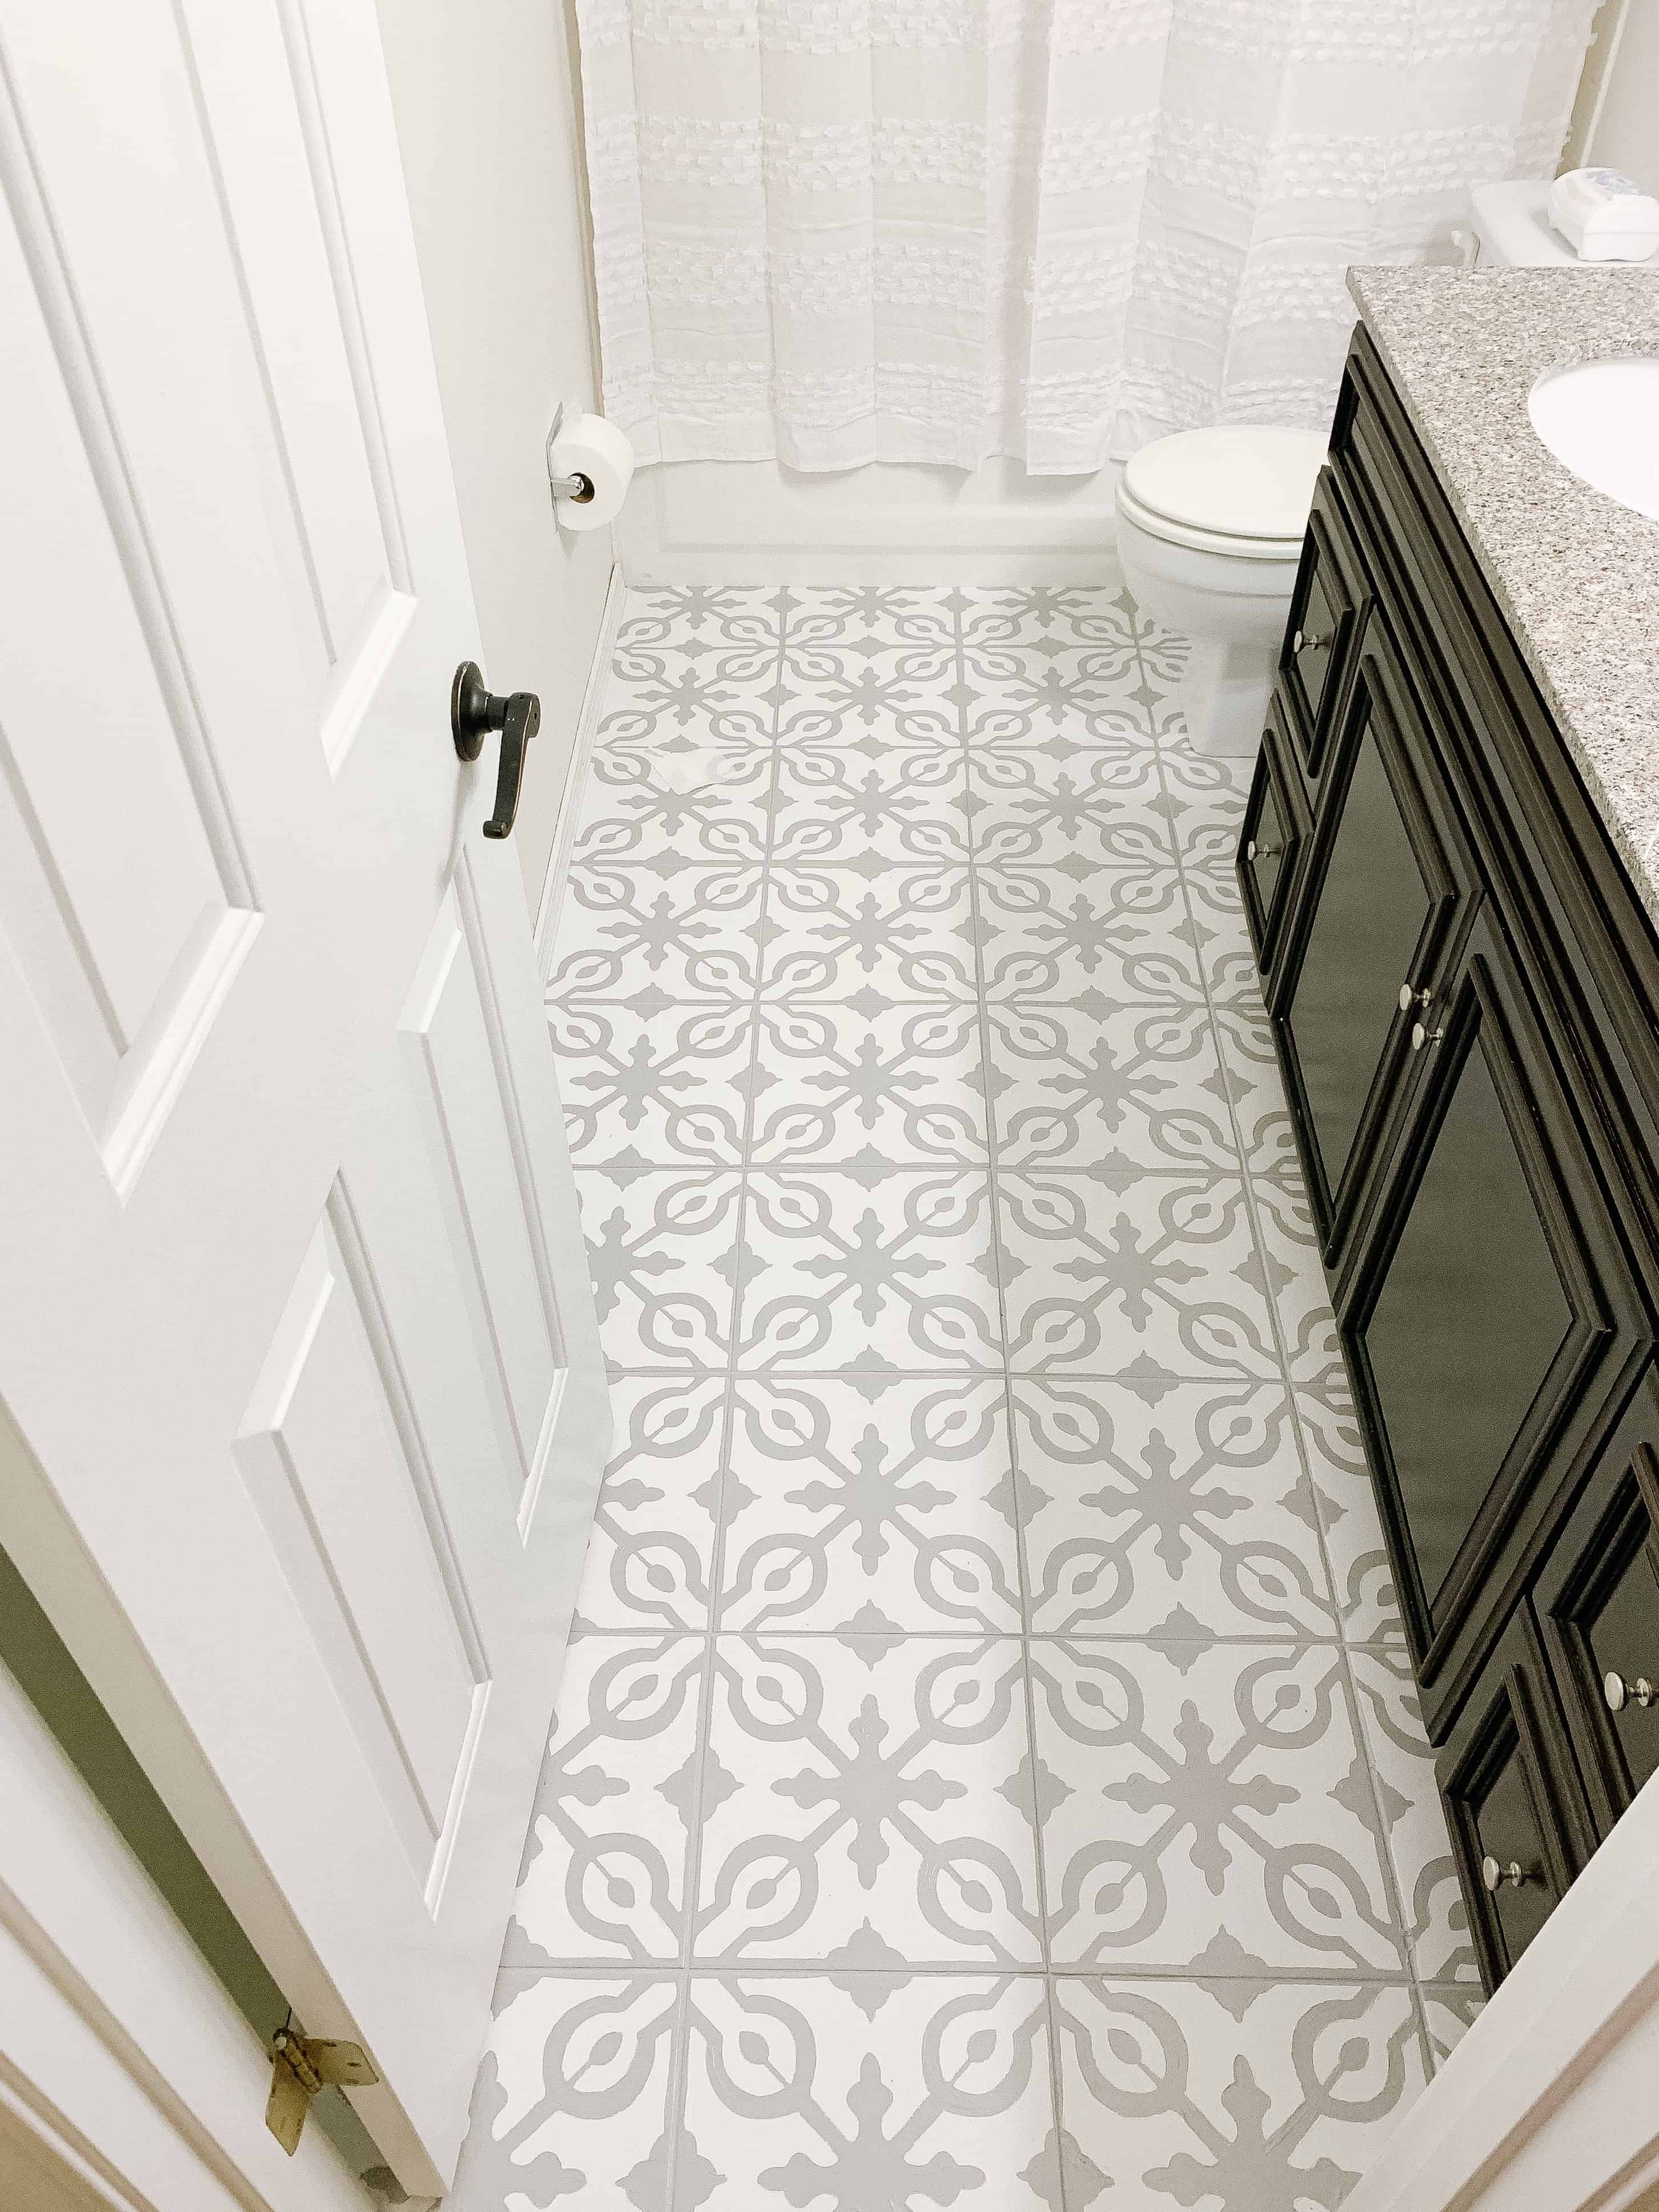
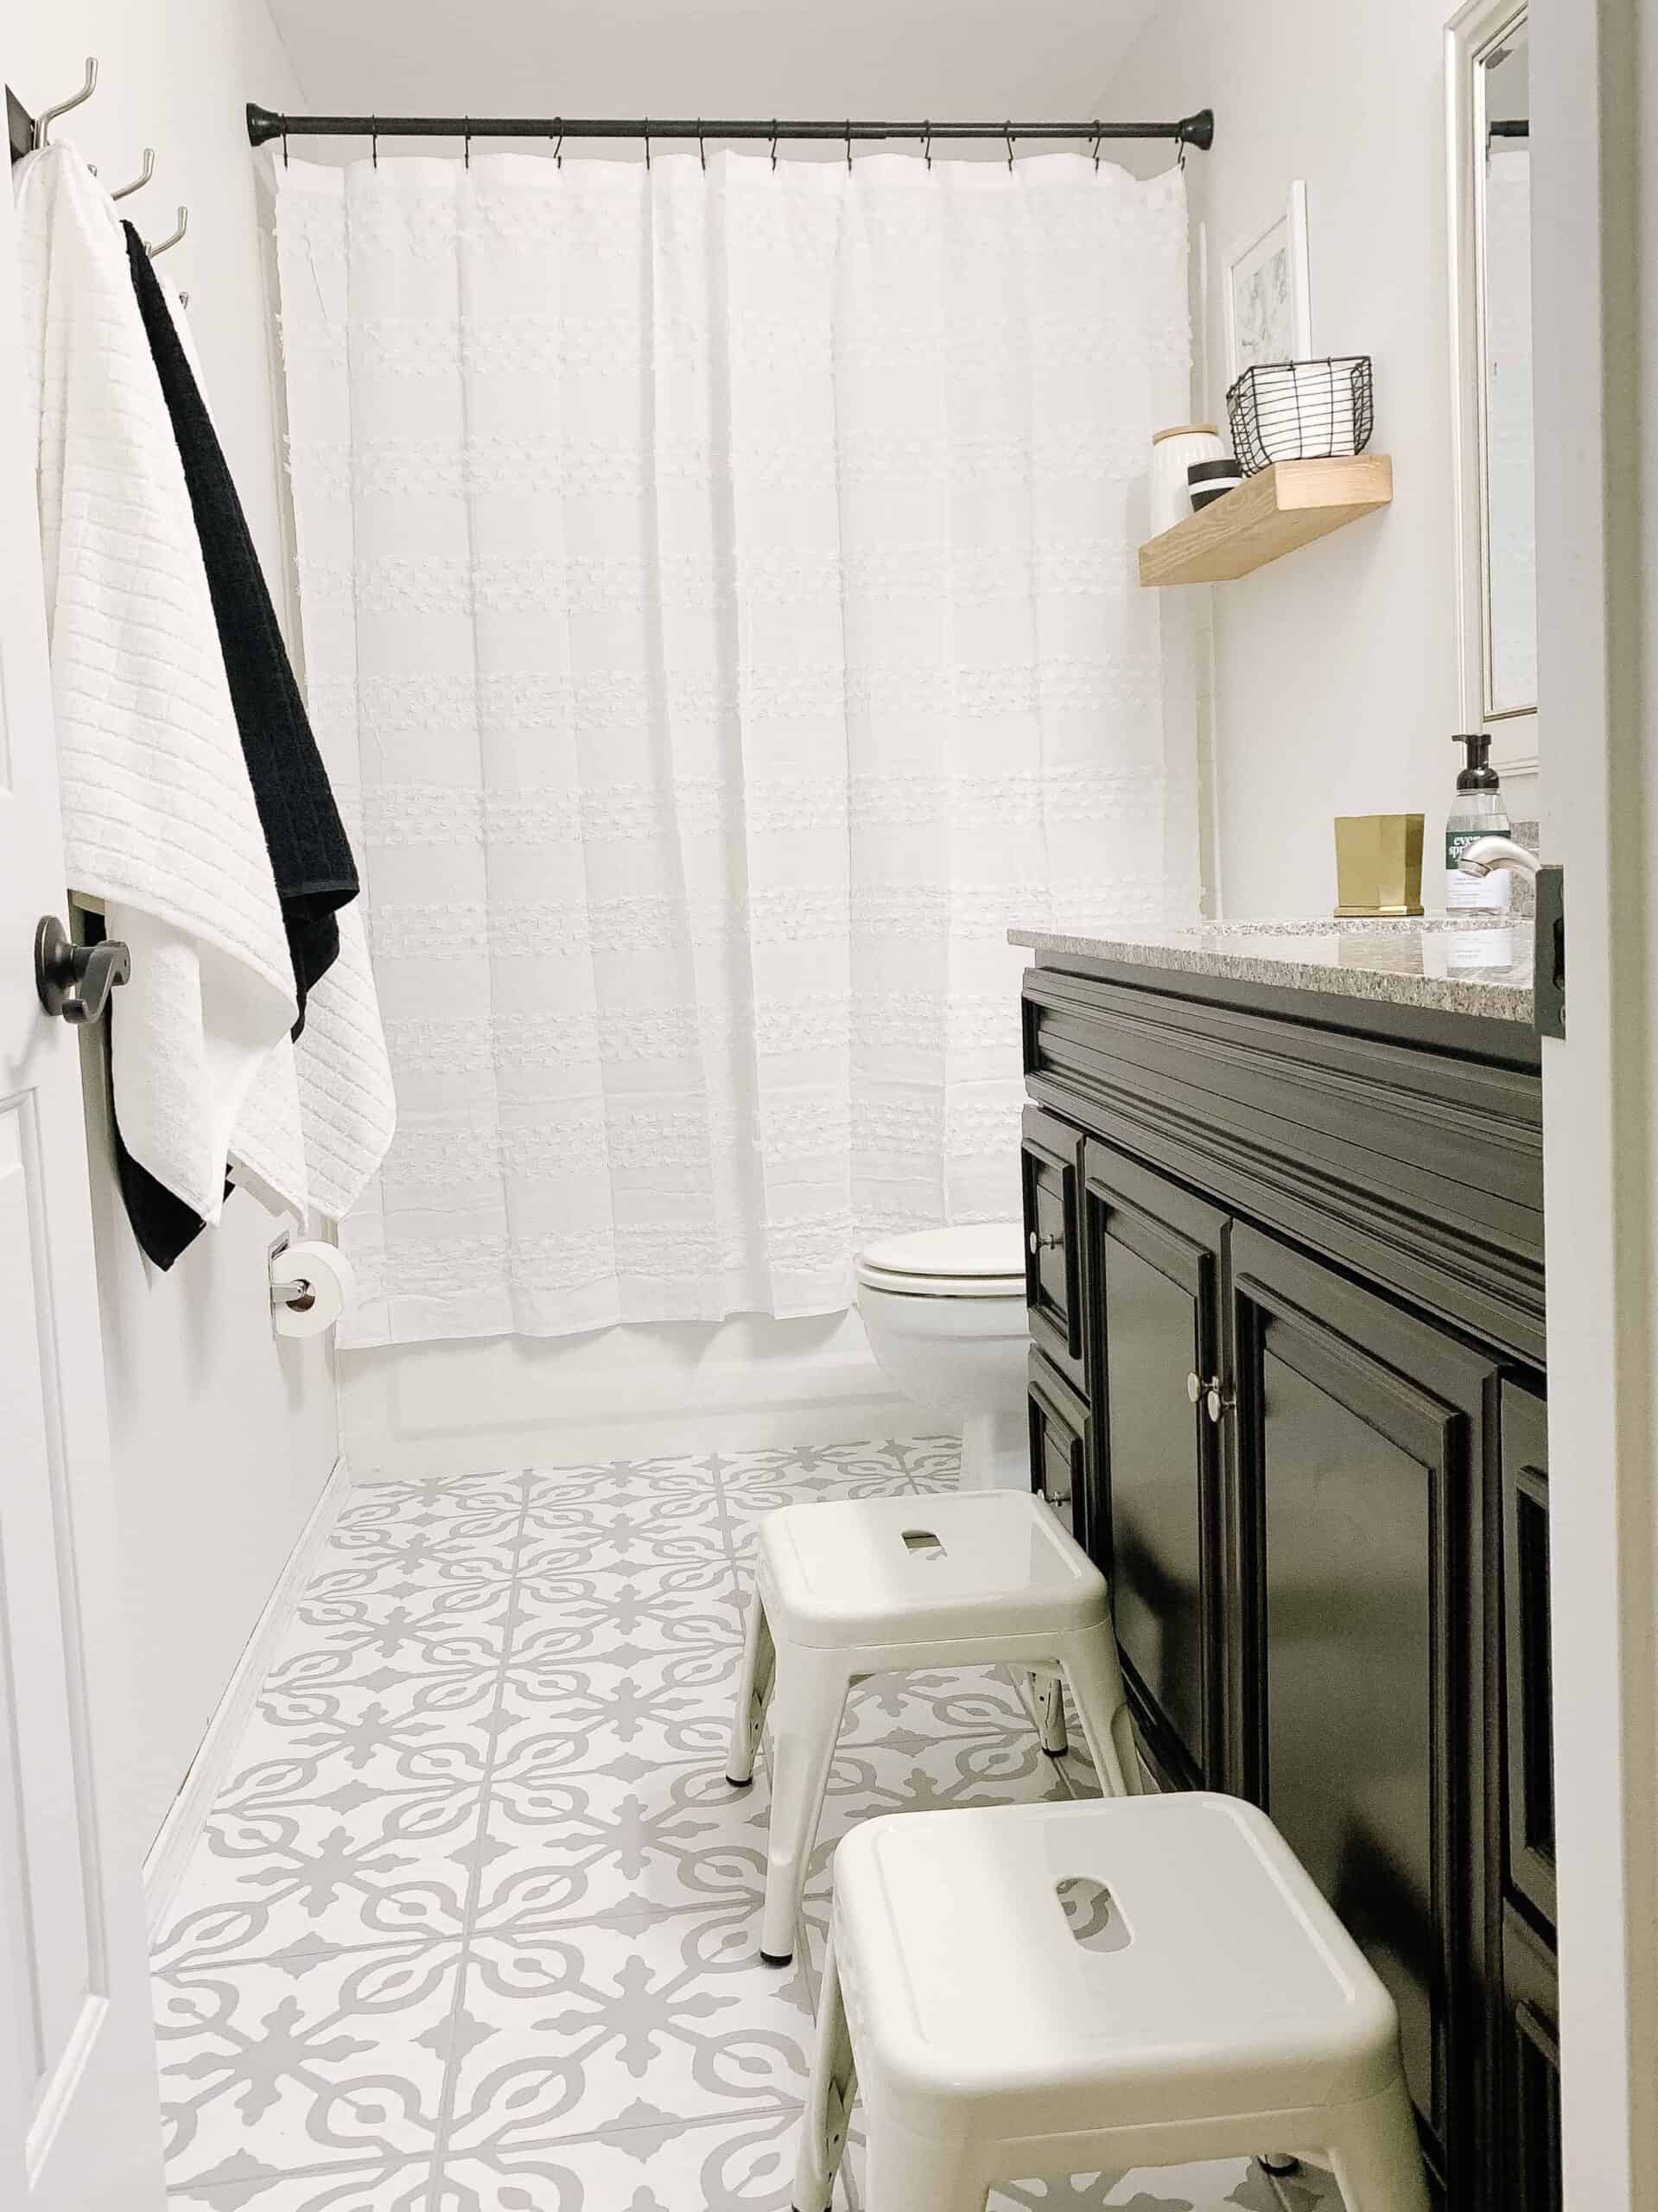
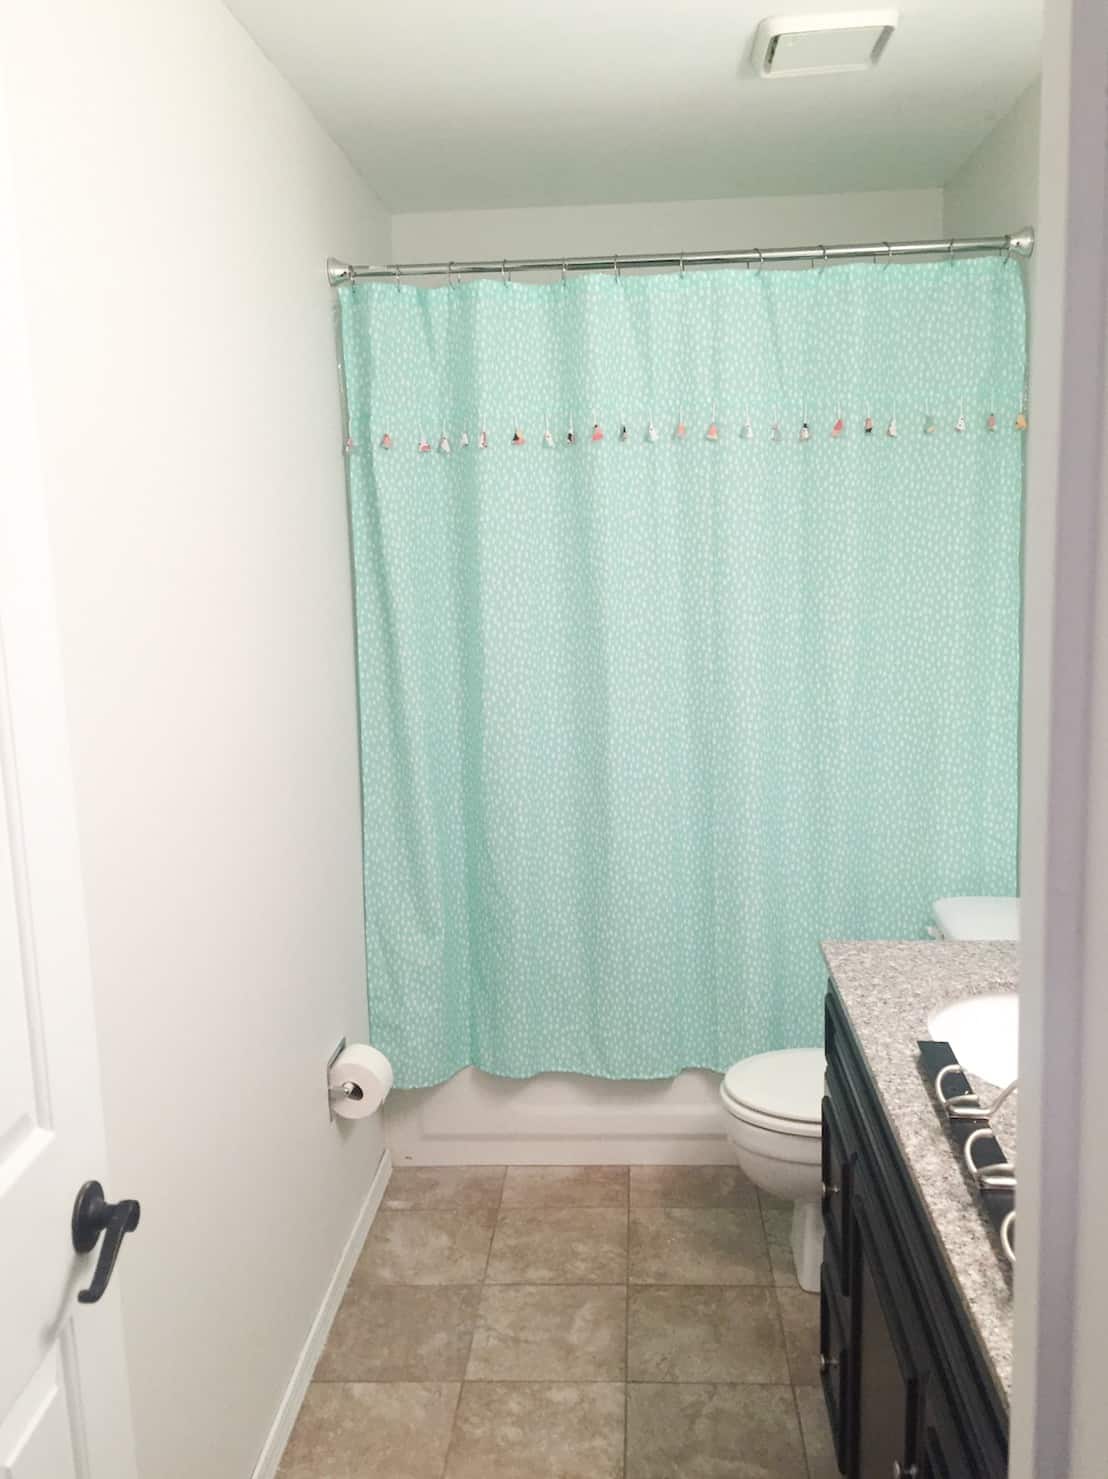
This is our kids bathroom that honestly is used for very little more than middle of the night pee breaks and brushing teeth. With that being said, it is right at the top of our stairs, and I see it a million times a day so I wanted it to fit the house a bit better.
I saw AngelaRoseHome do painted floors on Instagram (amongst other people) but was so inspired I knew I had to try.
I am going to walk you through the process I used for painting the floors in this post.
As a few disclaimers:
I set out to do this and have the bathroom done – start to finish – in 1 week. Because I am about 28 weeks pregnant it took me slightly longer to paint the floors, so it was more of a 2 week start to finish project in our house.
Common questions I have gotten since I started this post that will be helpful..
These are grouted tile floors, not laminate.
I did these floors 6 months ago and they are holding up great with so far no chips or issues. As stated above, they are not used heavily as far as showers/baths are concerned, but my kids do use the bathroom daily to brush their teeth and get ready for the day/night.
The video on the post is from the 6 month mark, and thus showing you how they are holding up!
Step 1: Buy Supplies
First things first, you want to make sure you have all your supplies. Below I have a list you can screen shot before you go to the hardware store, but I will also link to and list what I personally used here on this post, since lets face it – Amazon Prime makes everything easier.
For the stencil, I couldn’t find any I truly loved so I decided to make one. I used my Silhouette cameo to cut a stencil.
I will have a full section on how to do that in this post, but if you don’t own a Silhouette, you can also very easily grab stencils on ETSY. I will also talk about that option!
Supplies:
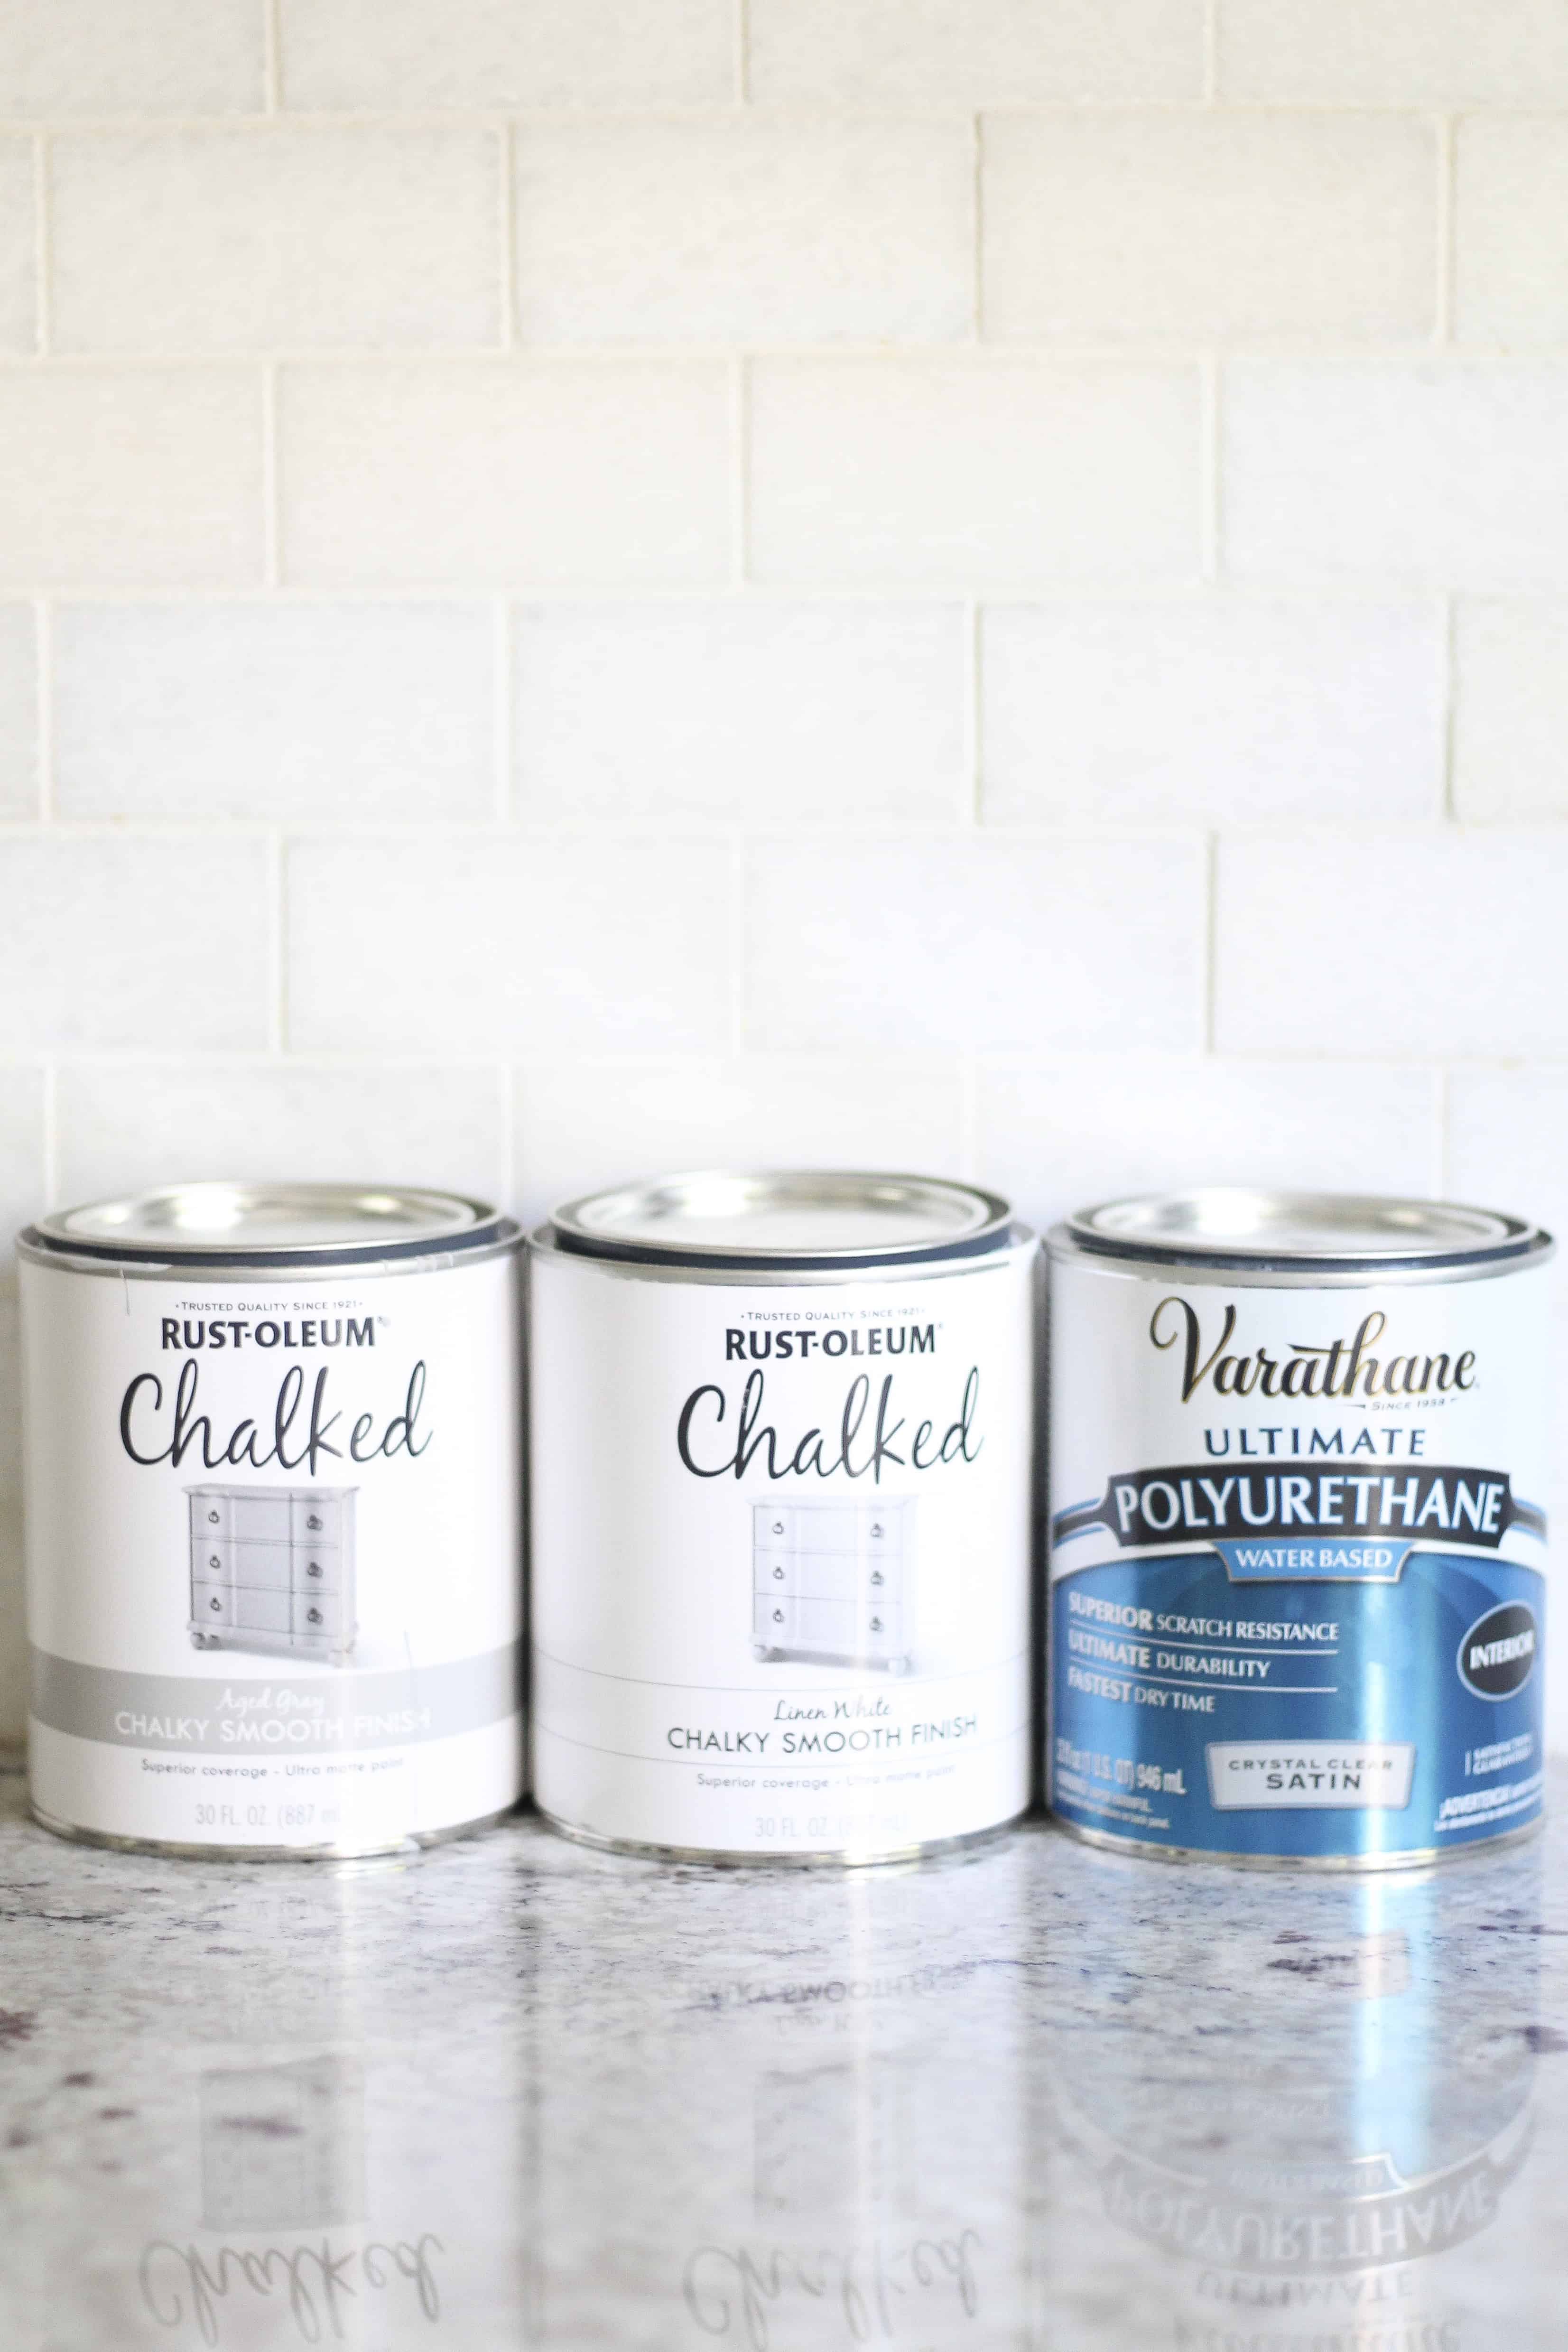
- Base Paint: For me I needed 1 quart of Grey Chalk Paint
- Stencil Color Paint: I used 1 quart of white chalk paint
- Sanding block or Electric Sander (personally used our electric sander)
- 1 quart water based poly sealer
- Small foam rollers
- Paint tray
- Stencils
- Small Paint Brushes
- Painters Tape
- Spray Degreaser
Stencils:
The stencil is probably the hardest part of this whole process. Finding a design you like, as well as a design that will work in your space can be tricky.
If you decide to make your own, one thing to remember is that the design needs to be connected all the way through. The first design I chose and cut basically ended up being two pieces and that wouldn’t work.
I will also add that after going through the entire process- the more simple you go, the easier it will be!
As stated before, I personally used my silhouette cameo for cutting my own stencil. I used this material with the cutter, and I personally went with this stencil option from ETSY as the shape.
They also sell this material at Hobby lobby – it is about $3.99 (before coupon) for 3 sheets, so this is a great deal on amazon!
You can also order stencils on ETSY – measure your tiles and just search it on easy for your perfect stencil. Hopefully you can get 3 or 4 of them in a pack (that would be VERY helpful). I personally wouldn’t try to do this with only one stencil.
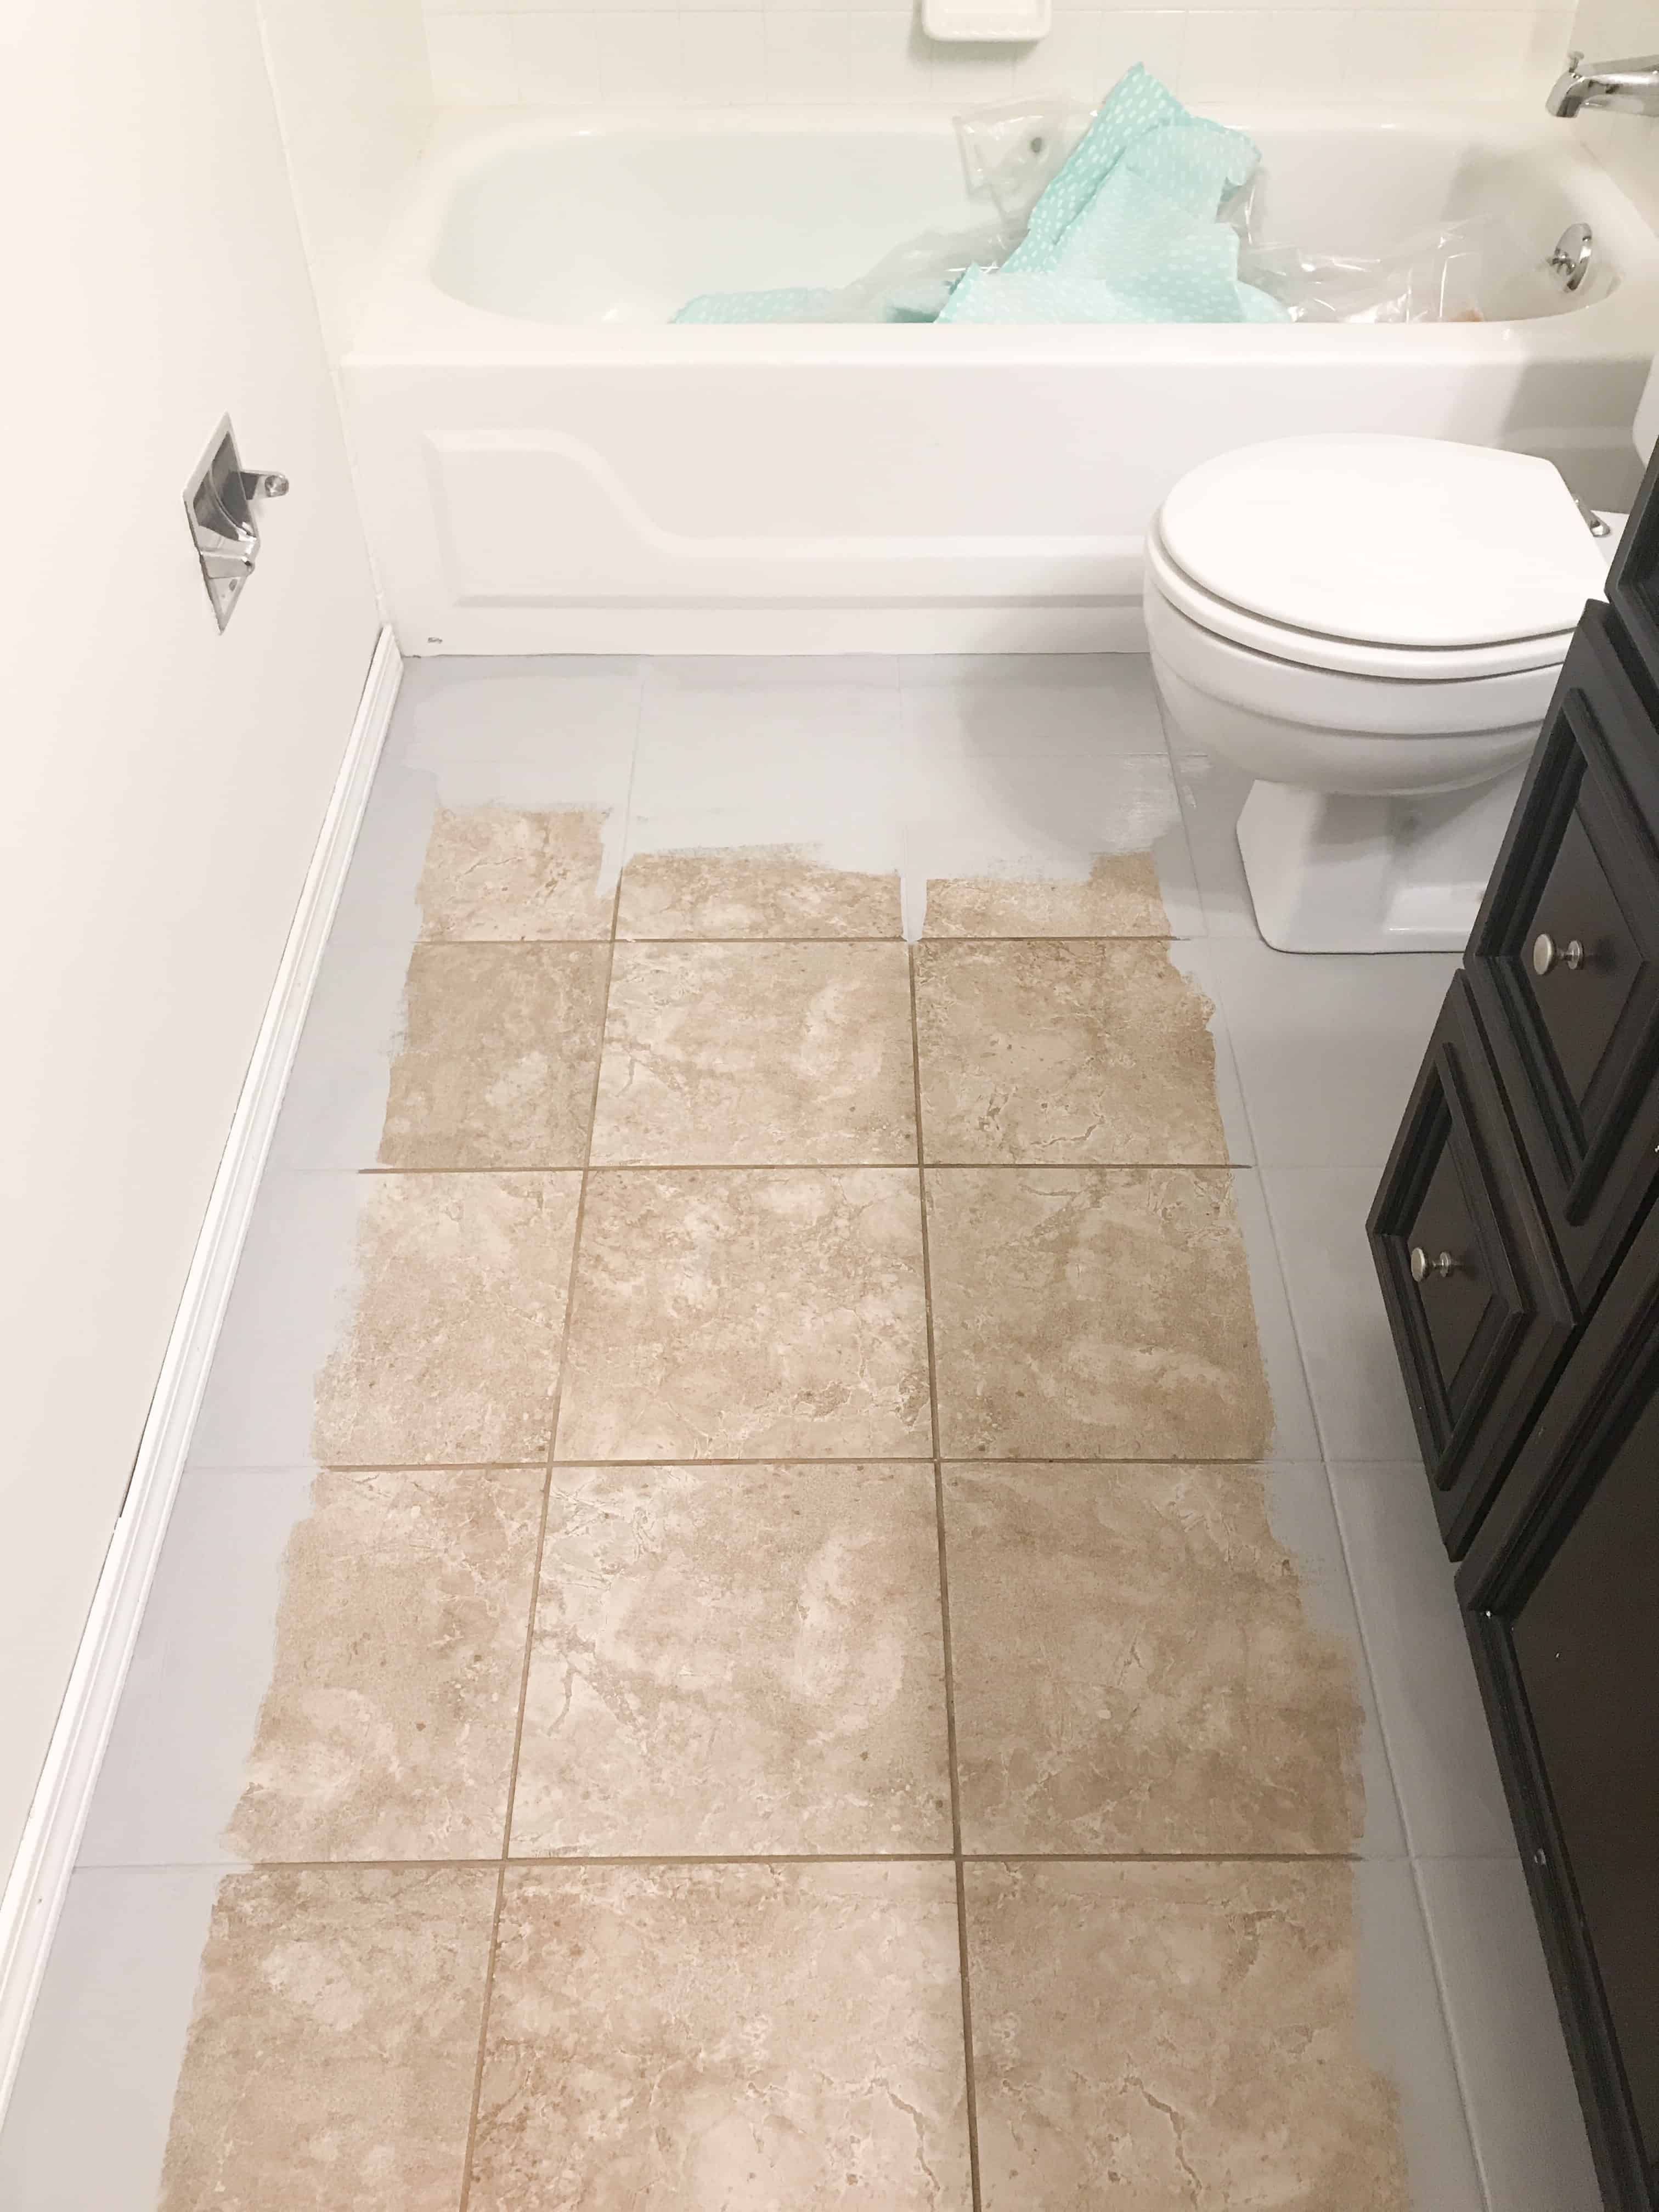
Prep the Floors:
This was my husbands job: clear the bathroom floors. You will then need to sand down the floors lightly with either your sanding blocks or your electric sander. Once you have done that you can clean them well with the degreaser.
Next give them a great final clean off with hot water. Let the floors fully dry before you do any painting! You really REALLY need clean floors with no dust for a good finish.
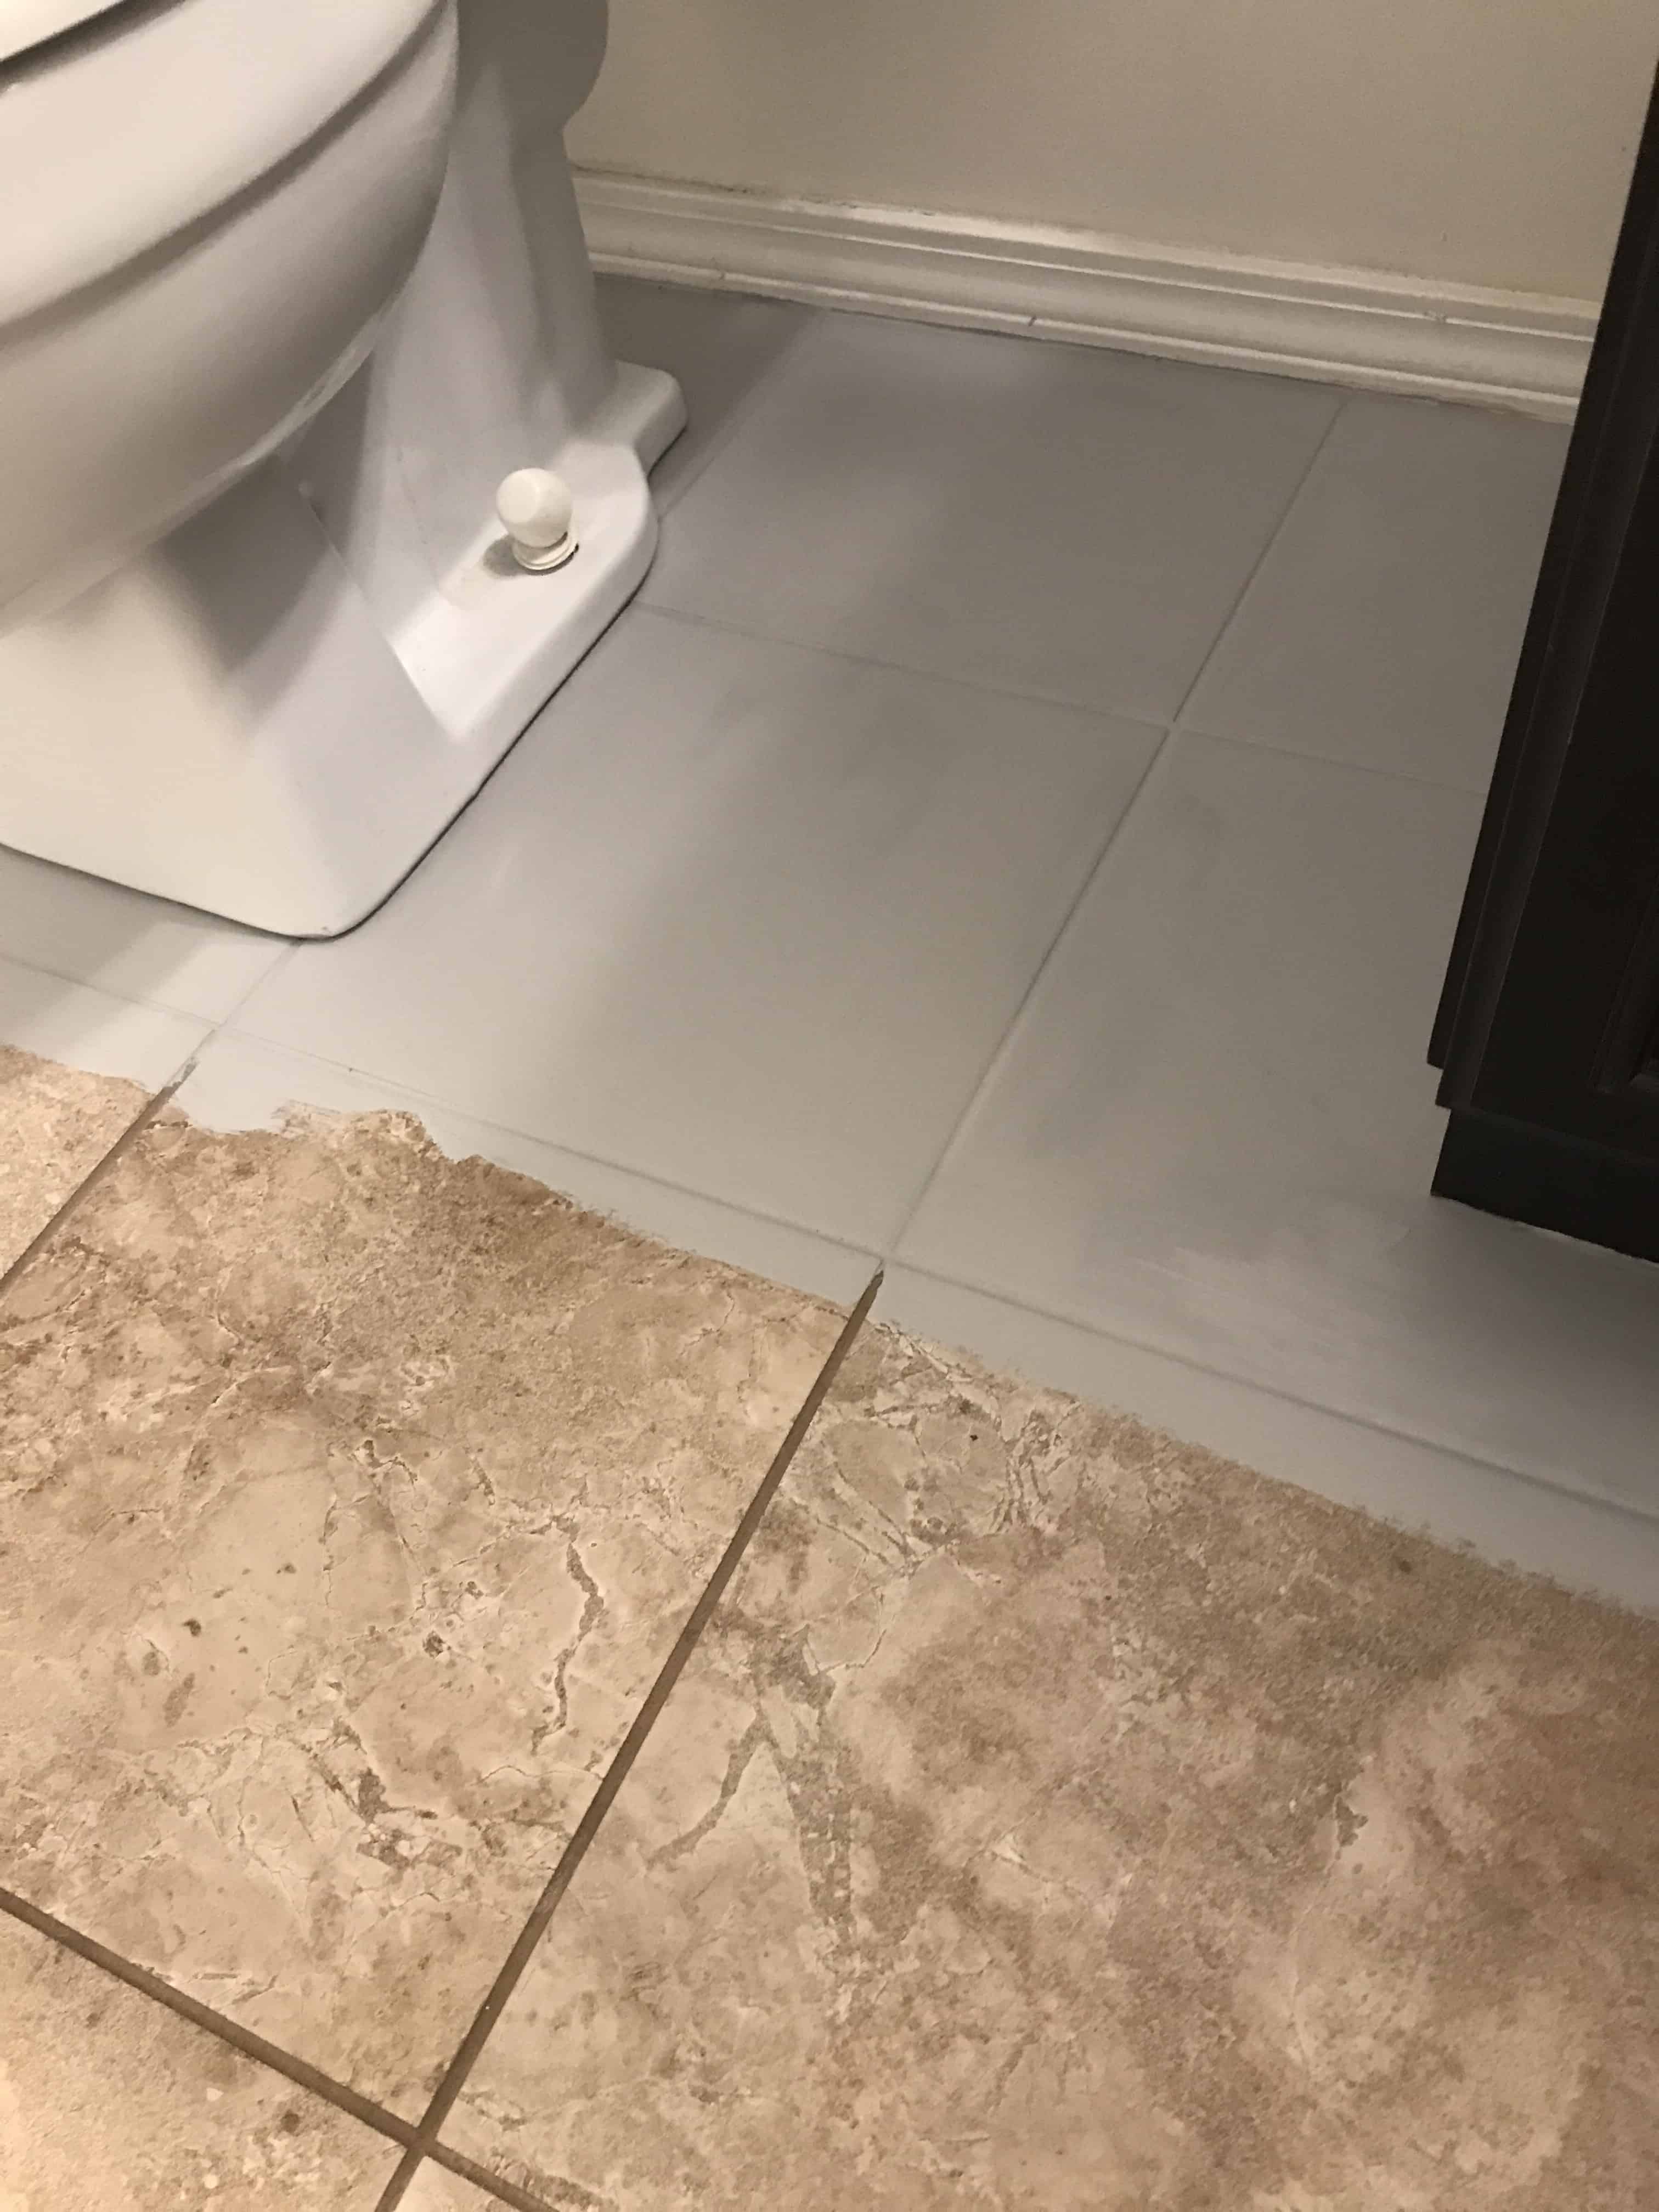
How to Paint Tile Floors:
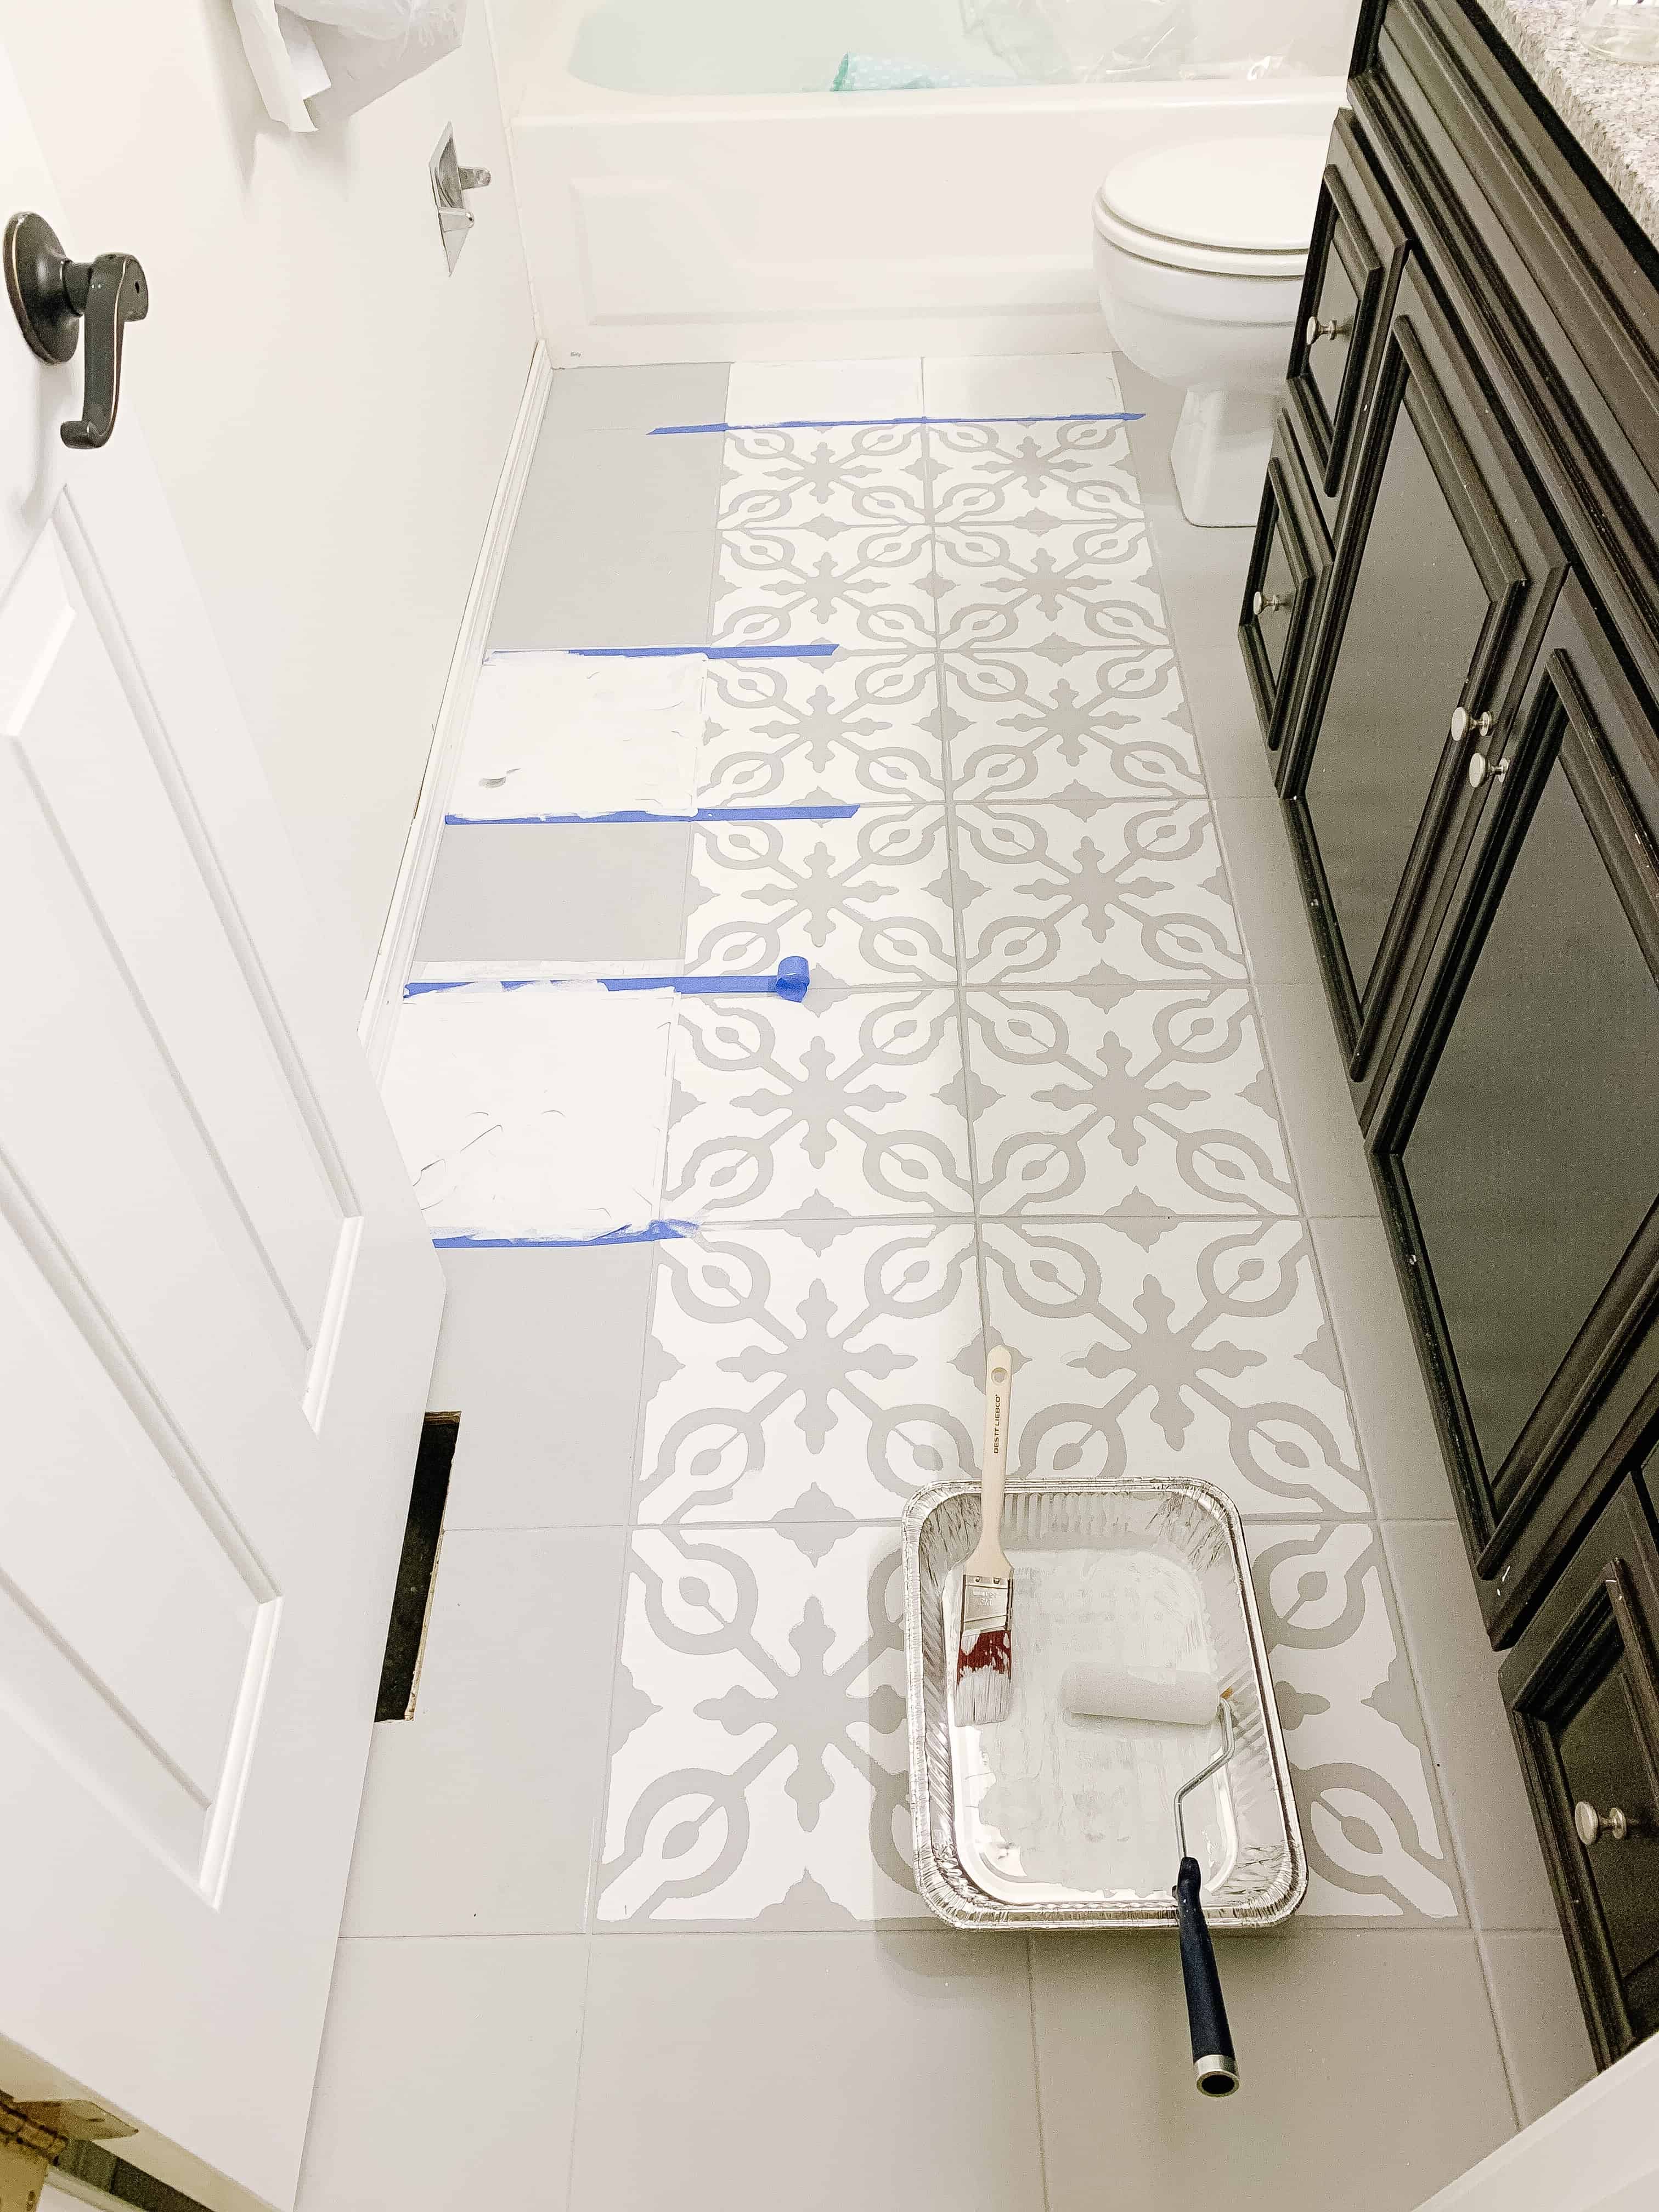
First things first- paint the floors your base color. For me I did grey first, so my husband did 2 coats of the grey paint, referenced above, on the floors.
For the first coat, we used a paint brush on the grout as well as a foam roller over the whole thing. The brush allowed us to get into the grout lines a bit better.
For the second coat, we just used the foam roller. We then let coat two REALLY REALLY dry before we started in on stenciling!
SOME TIPS FOR THE WHOLE REST OF THE PROCESS: wearing clean socks any time you walk in the bathroom will help keep the floors clean while you’re doing this. Keep in mind this is paint. IF you walked on your walls they would get really dirty, so before they are sealed, this is very helpful. You should also wash your hands well before you head in to paint each time.
Stenciling:
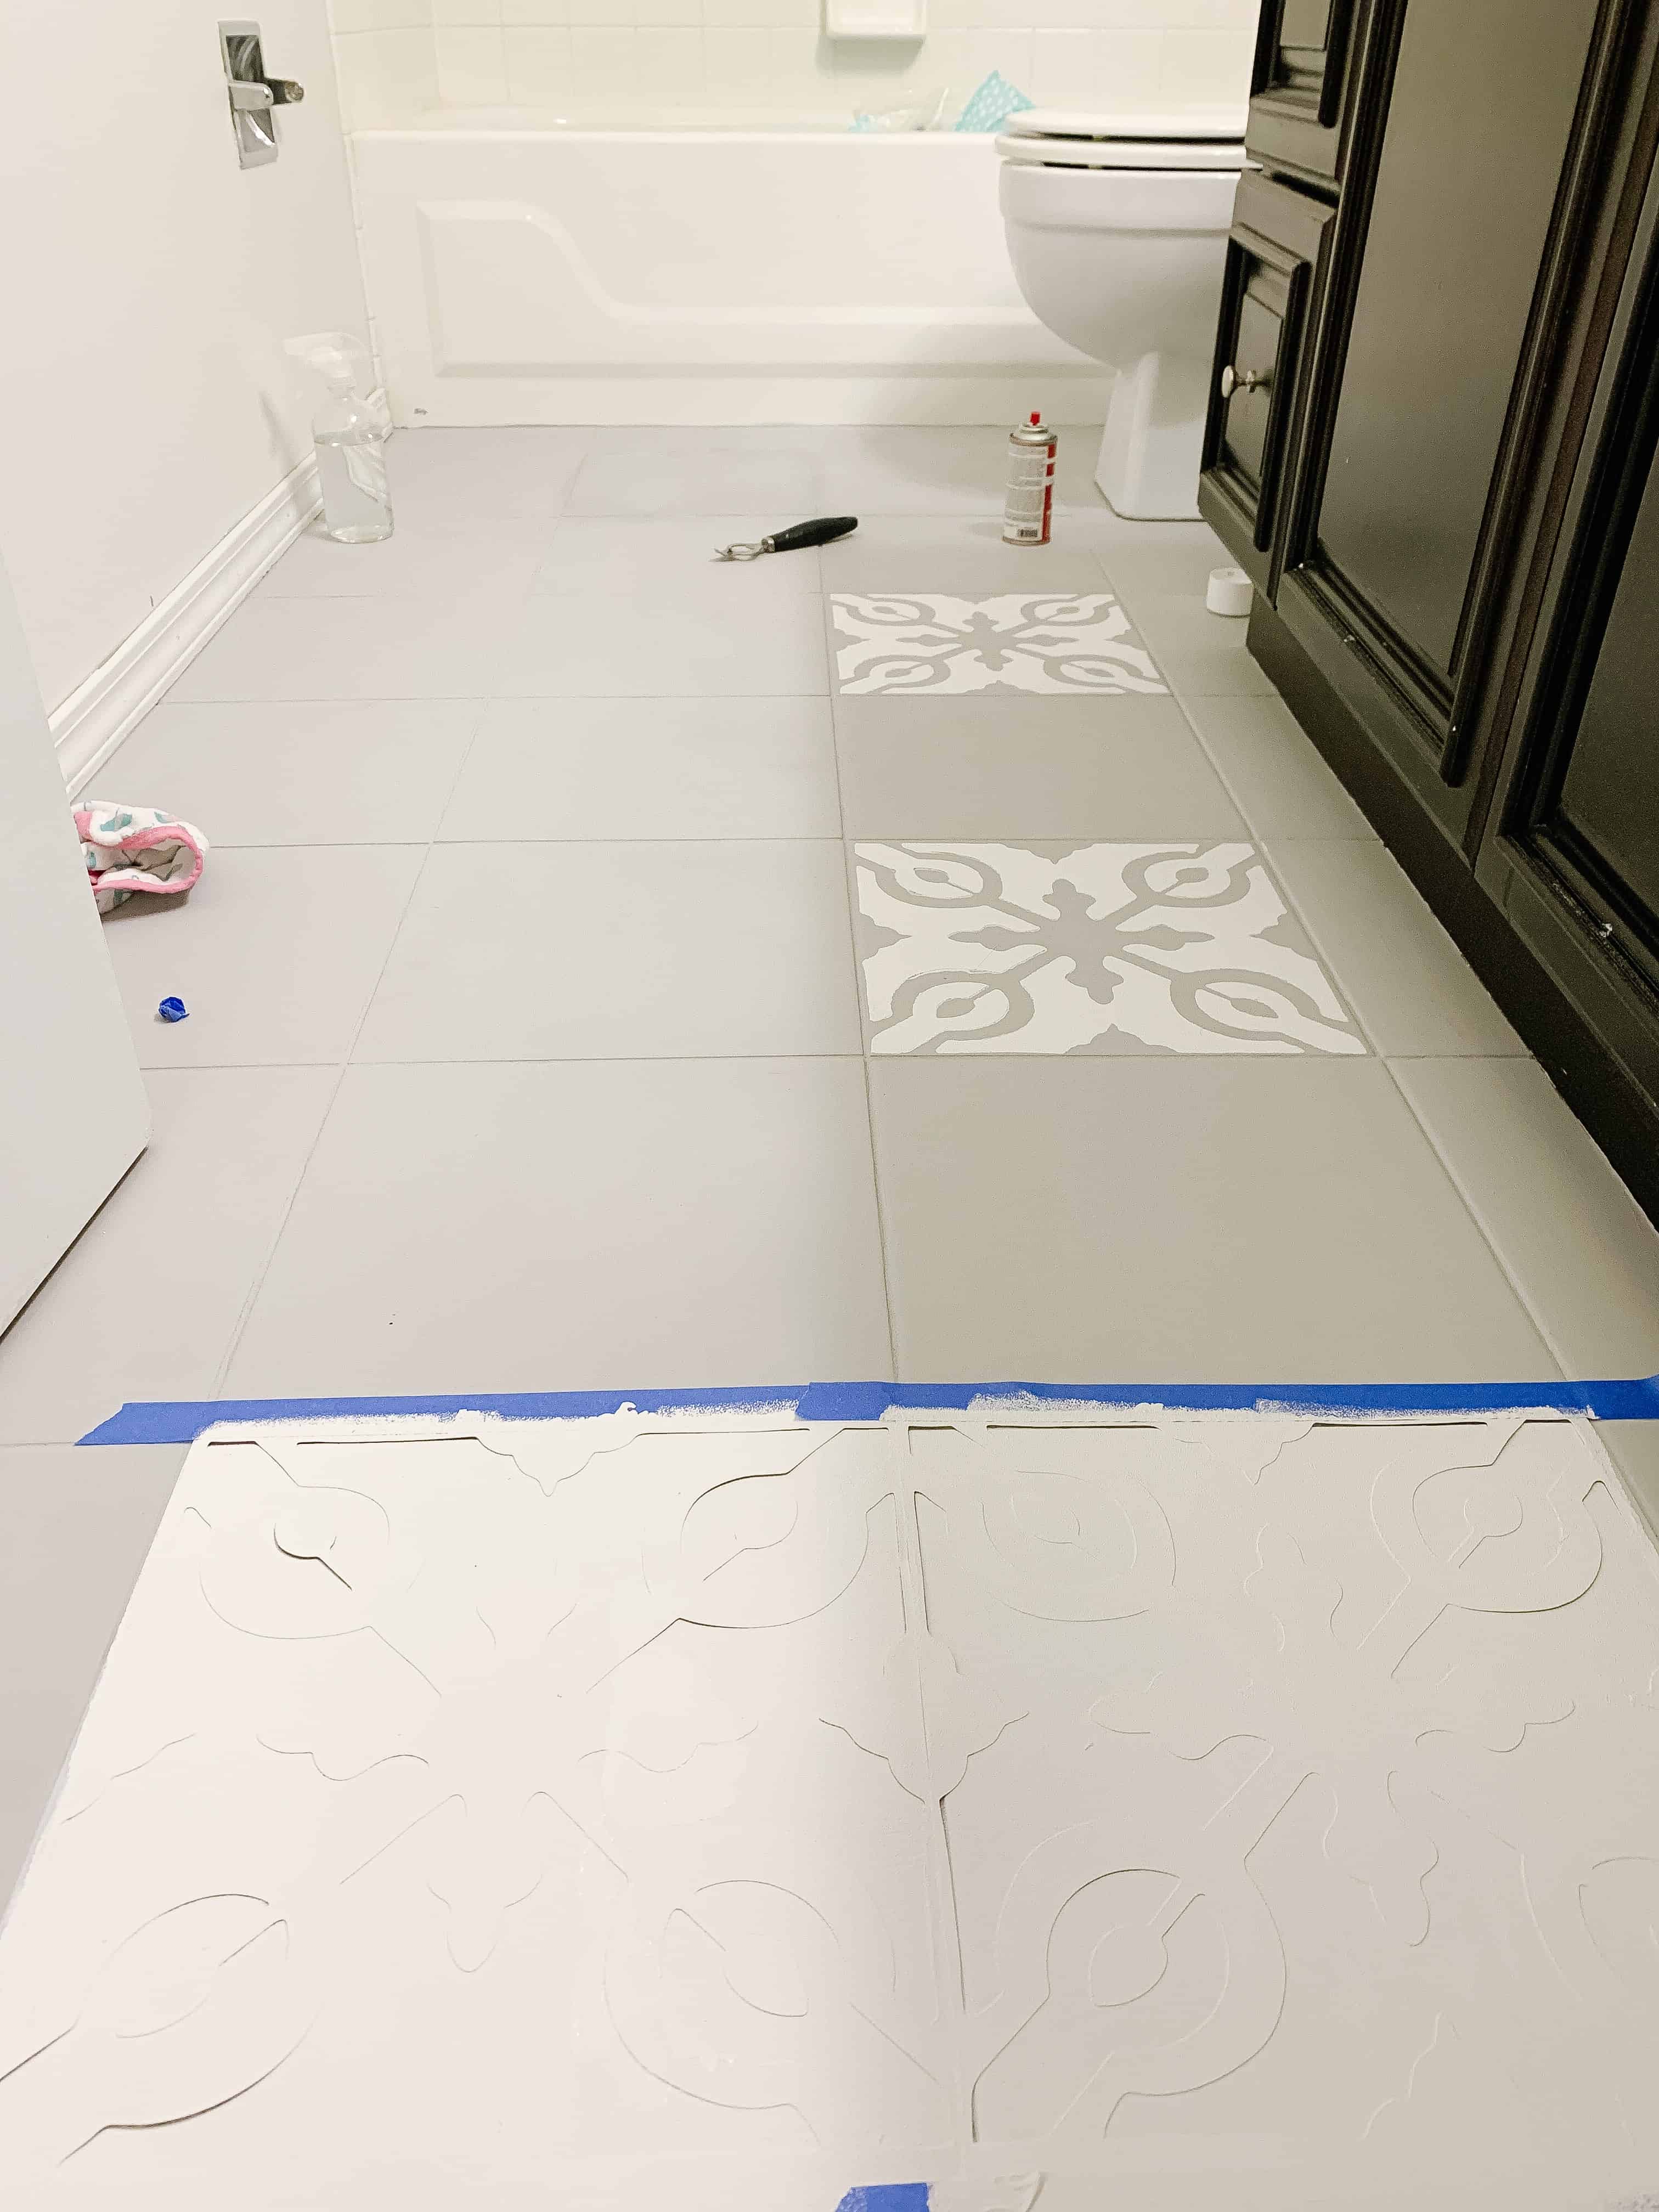
A little tip I did not fully think of when doing this because I was too pregnant and tired, but I think it would have helped save me A LOT of time and effort on touch ups would be to place your stencil down then roll a coat of your base color (so for me the grey) first. Once that dries then roll your first coat of the new color.
Now for the trickiest part of the process – stenciling! Start near the back of your bathroom and pick a full square. Tape it down on all sides and lightly roll it out in one direction with your new paint color!
Below are my BIG TIPS for stenciling:
- LIGHT COATS ARE YOUR FRIEND. Do not do heavy coats. If you do one super light coat first it will sort of tack down the stencil and allow you to do the heavier coats more easily too.
- Roll in one direction if possible.
- Don’t let the stencil get too dirty. I noticed that the cleaner and fresher the stencil was the better, so I washed mine each night. When the stencil is dirty, paint builds up on the under side.
- Pick a spot to line up the pattern for each. For mine it was the middle little thing on the edges. It will look more like tile if you line those up. It is sort of hard to use your grout lines as your spots to line up.
- Let the paint fully dry before you lift the stencil. Being in a hurry will do you no favors – you will just spend more time on touch ups later.
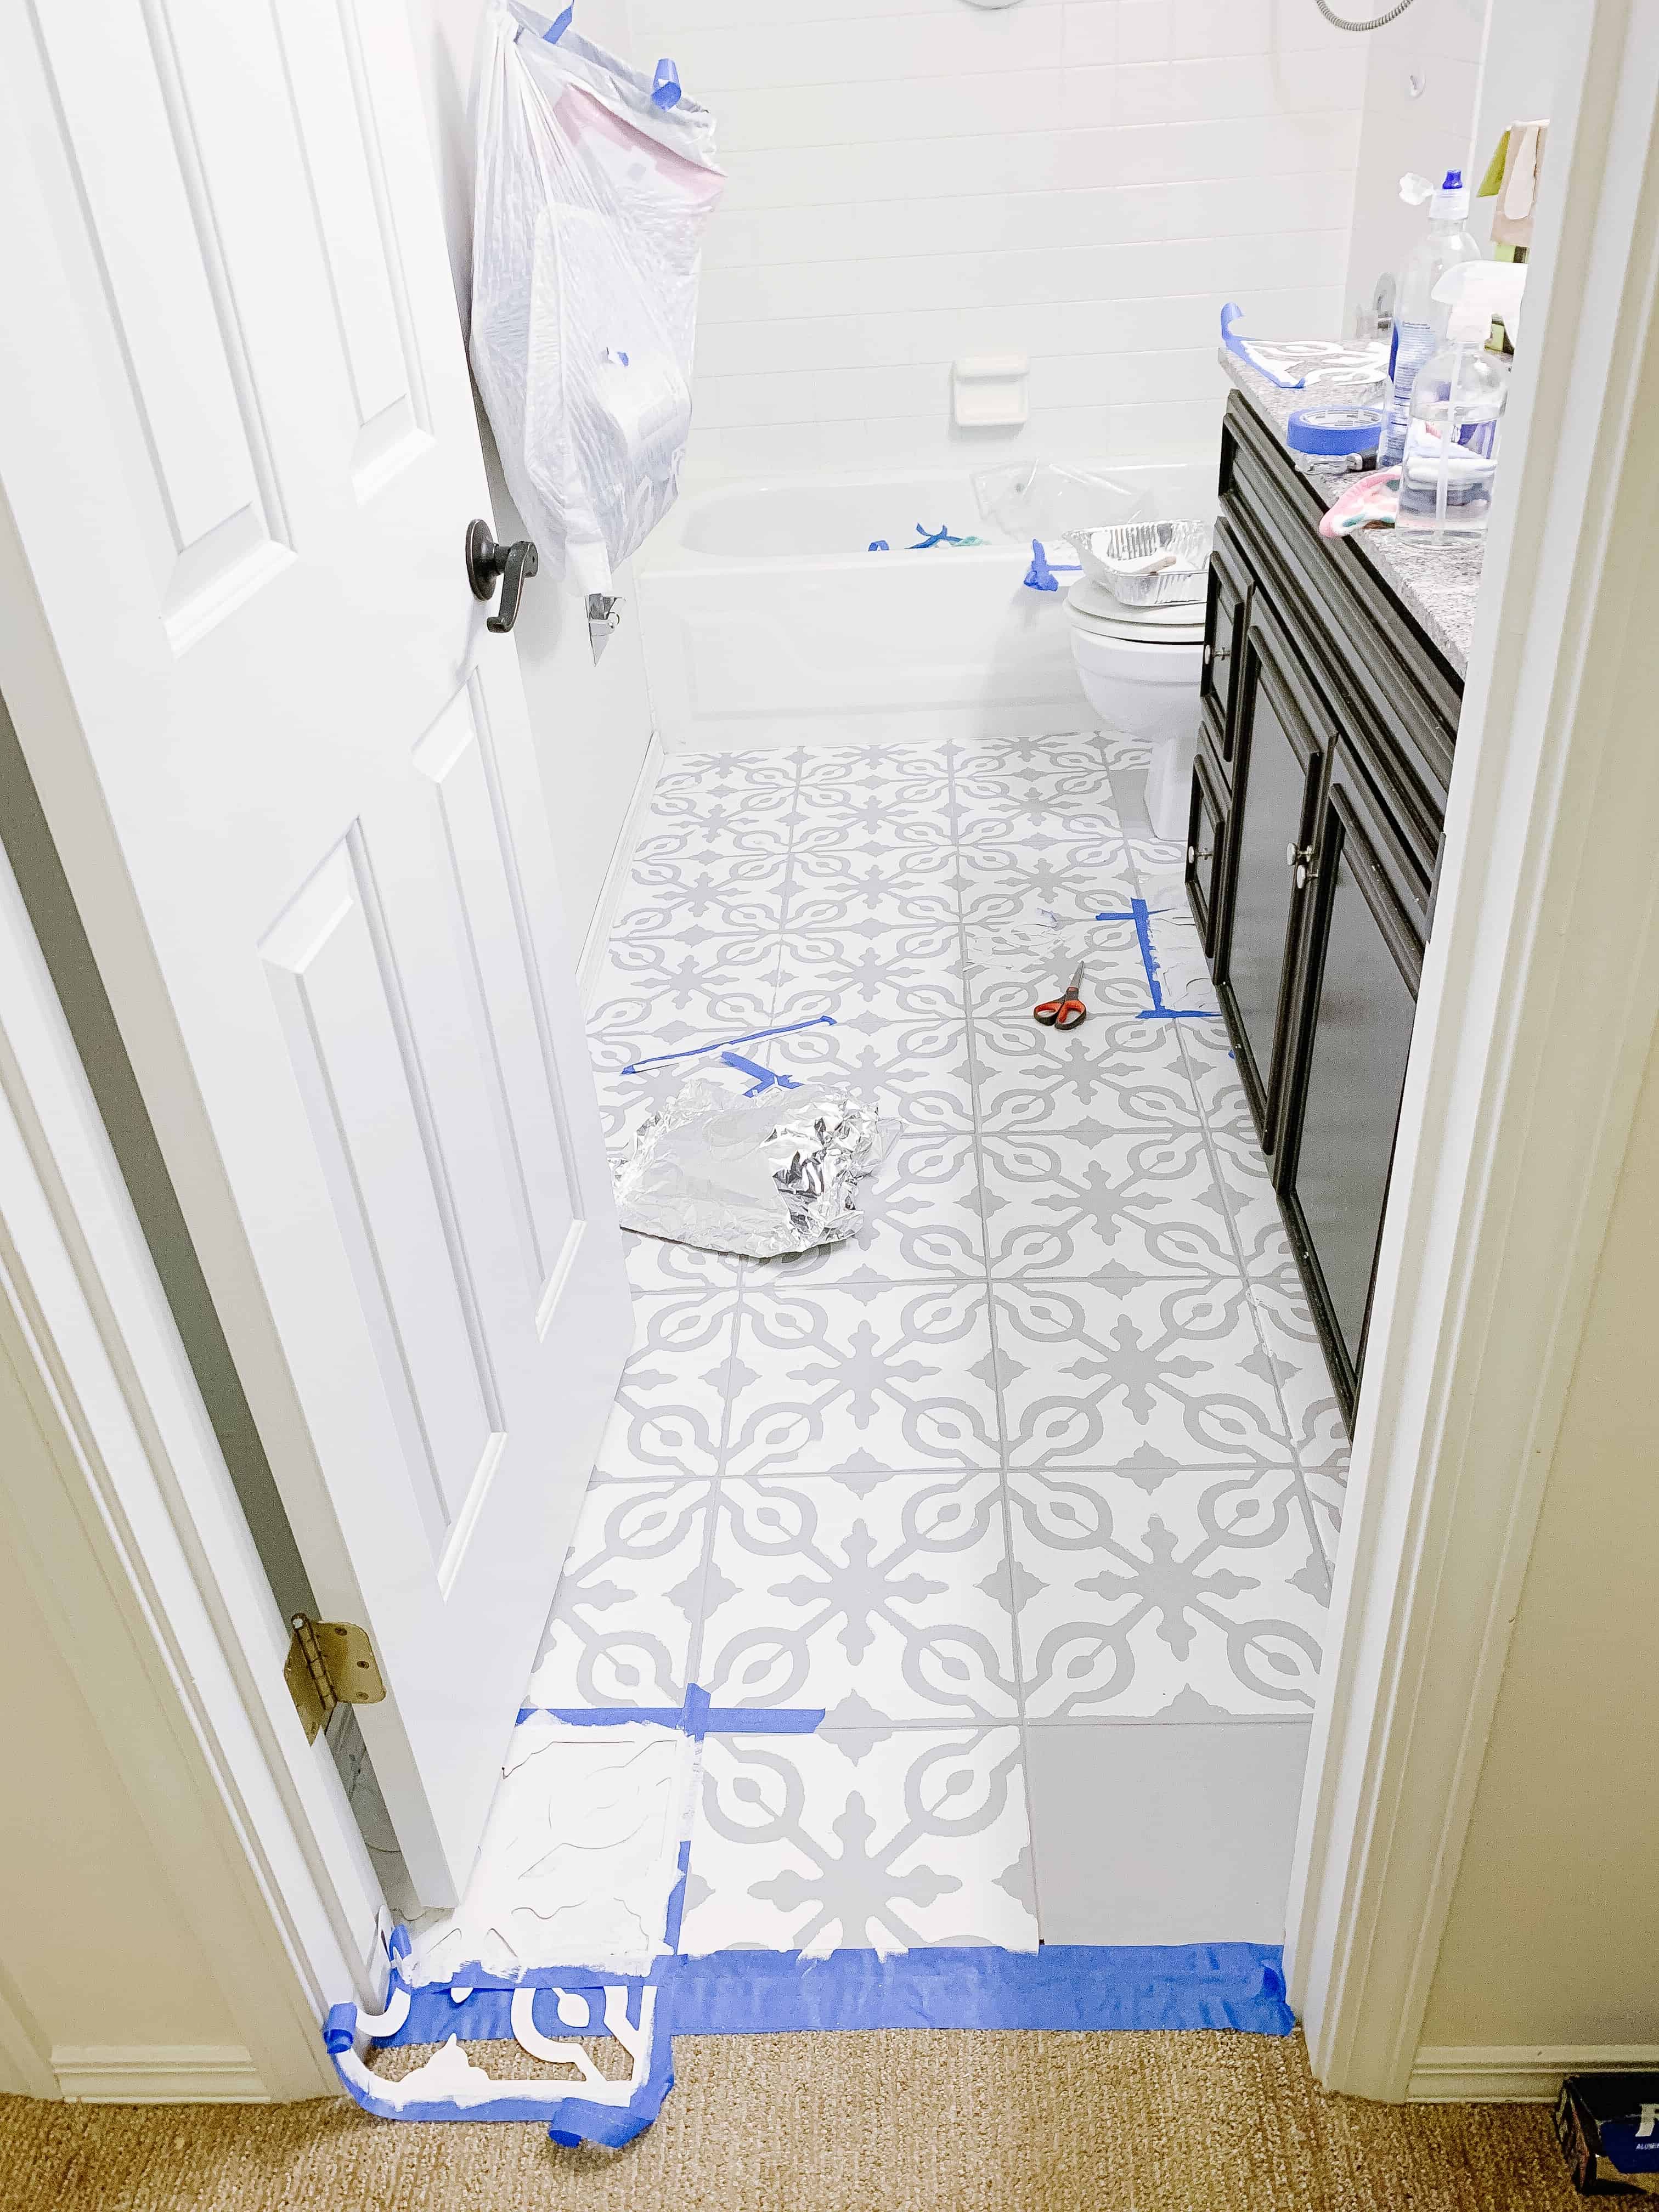
I completed all the full tiles first. If you can, tape down several stencils in a row and do them all at once, so that you don’t have to jump around too much. But be aware that you will have to do some jumping so that you’re not taping onto freshly painted tiles.
Because I had access to cutting my own stencils I trimmed mine once that was done. SO FOR INSTANCE: I cut one stencil to use against the wall.
I trimmed another to use on the whole row against the tub. I saved 2 full sized stencils for around the toilet that I was able to trim.
Take your time, and piece together what you have to. There will be a few pieces that are tricky, but they aren’t as overwhelming as they seem.
This is also a one reason I would recommend ordering more than 1 stencil. The time but mostly the sanity it saved towards the end was very worth it to me.
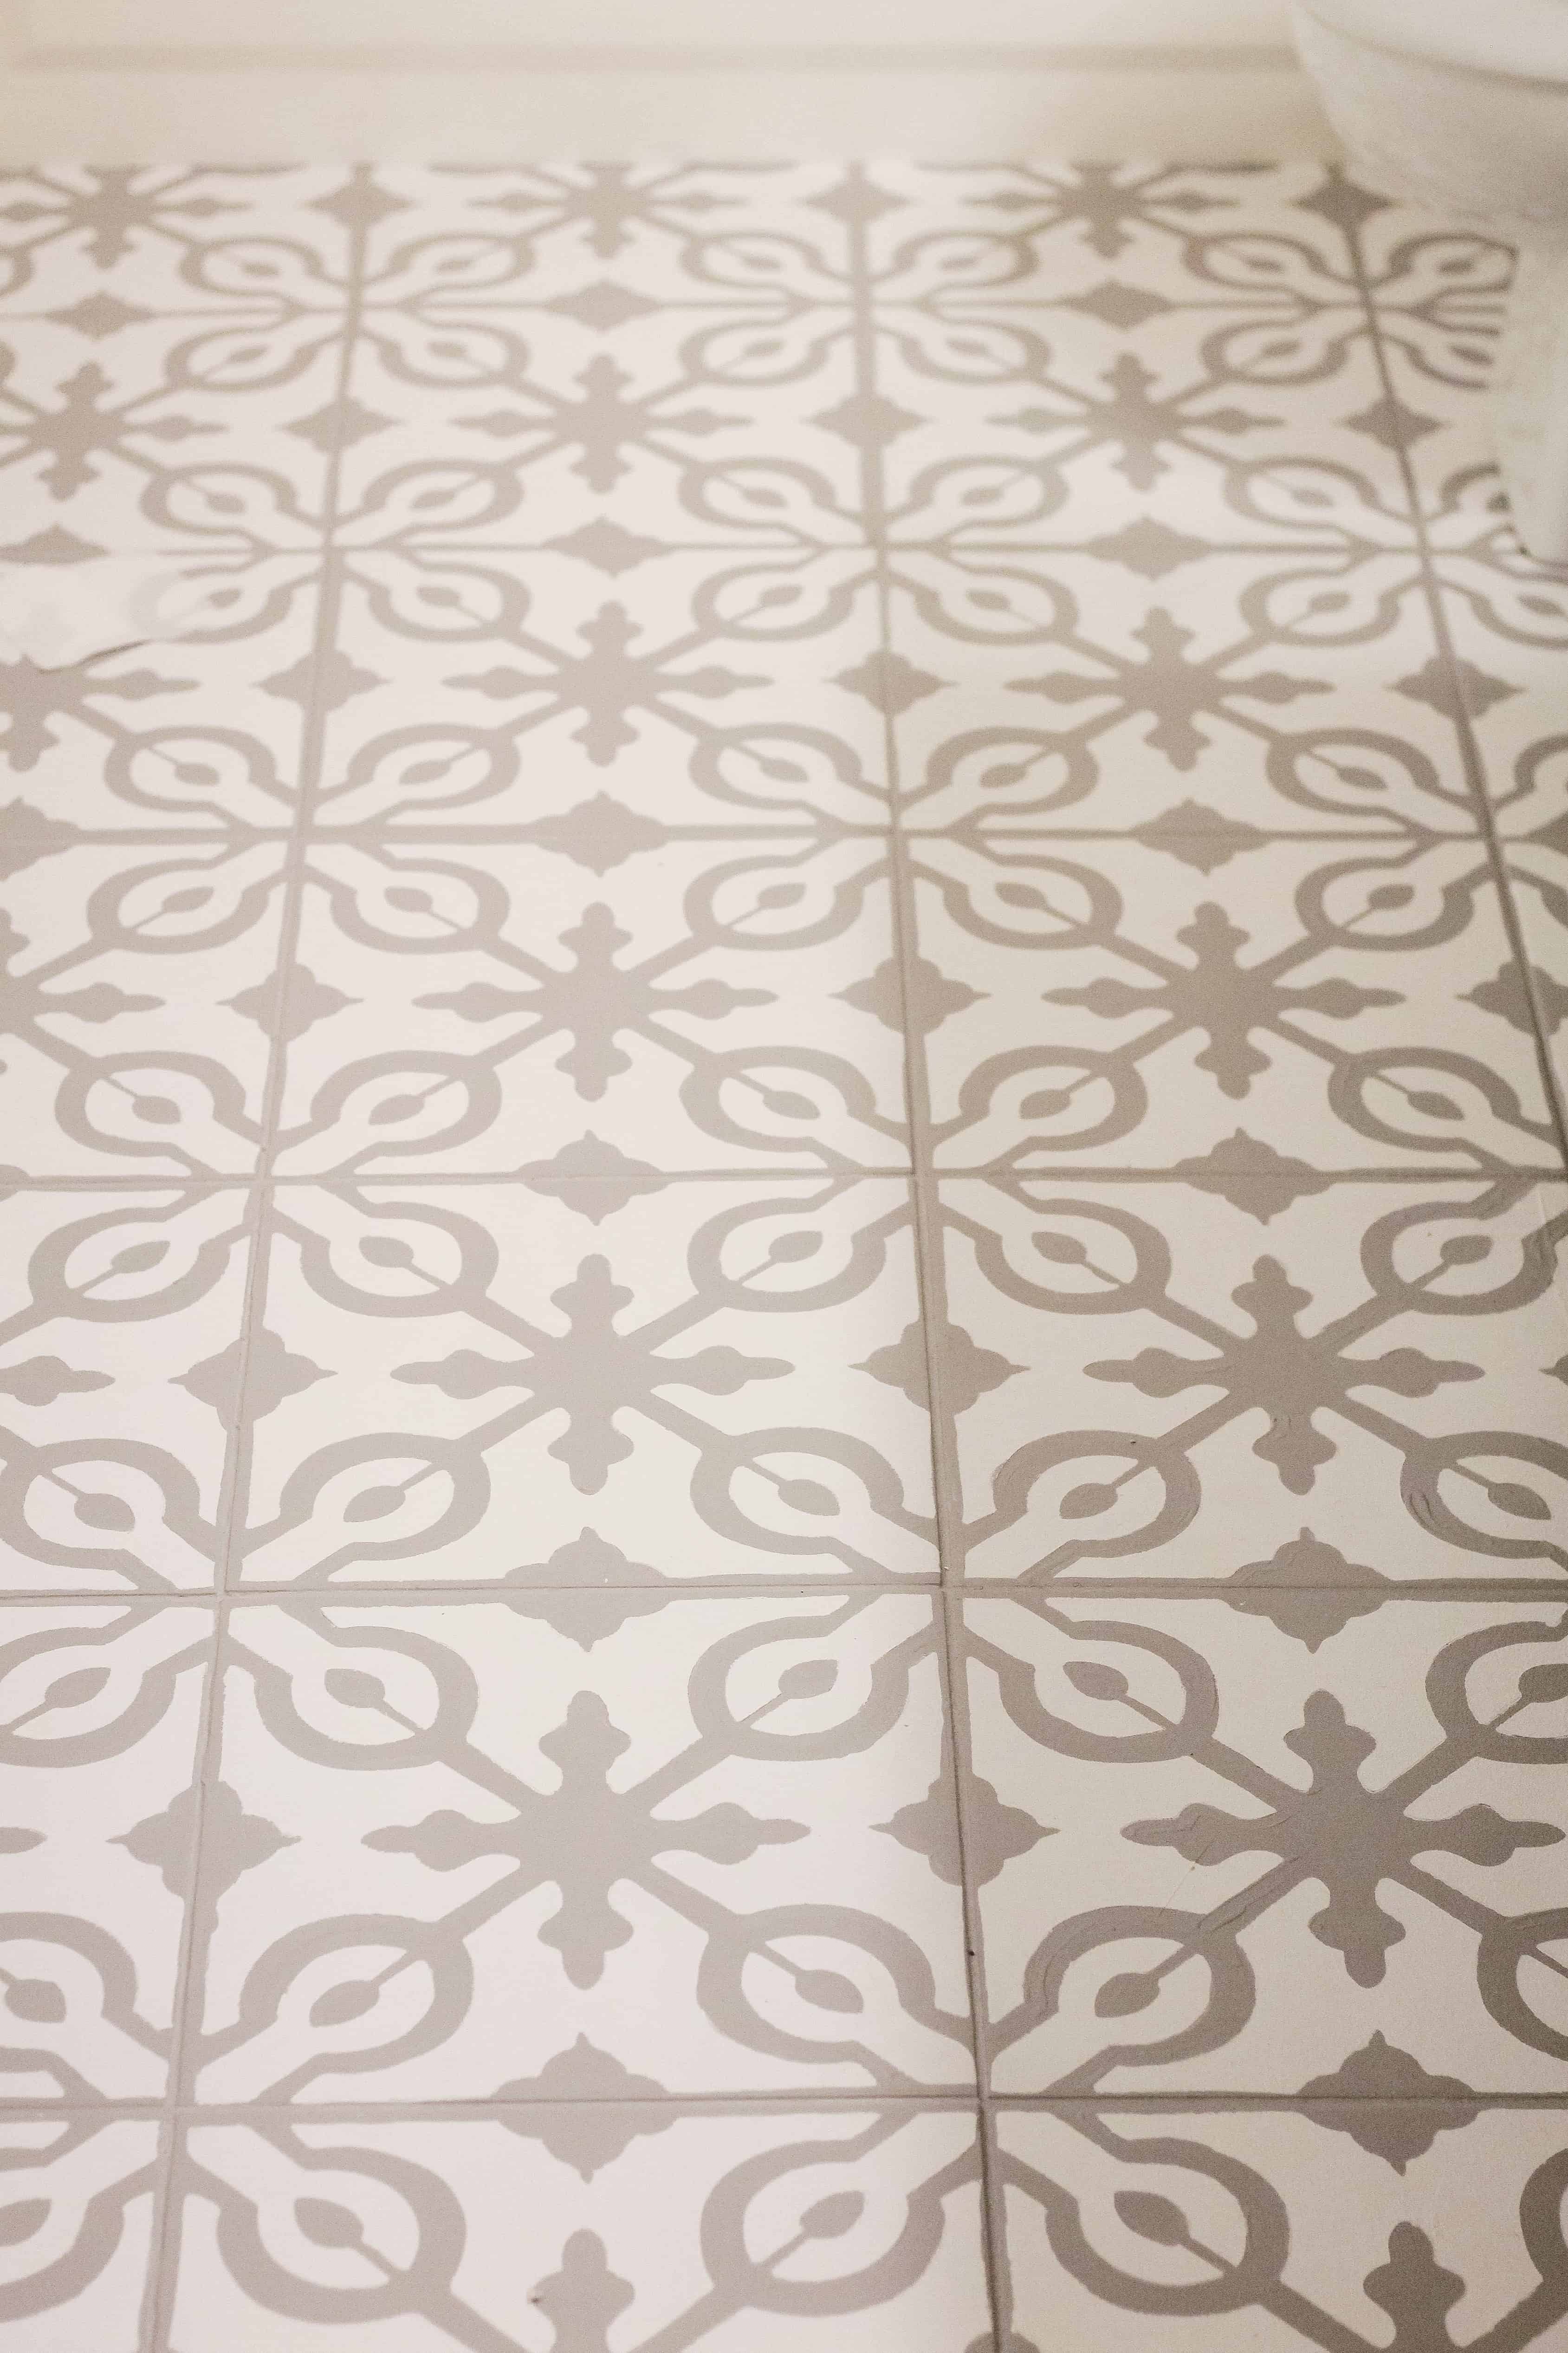
Once all your floors are stenciled you will be ready to touch up. AND BELIEVE ME WHEN I TELL YOU, THERE WILL BE LOTS. I started at the back of the bathroom and filled a cup with white paint and a cup with grey paint and just touched up little by little.
I found that having a foam brush and a tiny paint brush for each color was best because both options served different purposes. It took me roughly 2 to 3 hours to touch up the whole bathroom, so it was not a fun process. However, knowing my personality, it was time well spent.
I do think if I had taken the time to do the coat of grey over the stencil, the time spent doing touch ups would have been majorly cut down.
Sealing the Floors:
The last step is to seal your floors. Make sure your floors are FULLY, FULLY, FULLY dry. Then you will use a foam roller and roll on the sealer all over the floors.
Did I mention your floors should be really dry? The sealer needs to completely dry for 2+ hours between each coat of sealer, and a light sanding will make for a smoother final finish.
Basically between each coat of sealer, take a sanding block and LIGHTLY sand the floors and then give them a good wipe down, then repeat. We did this for a total of 4 coats of sealer to be safe and make sure it really wouldn’t chip!
Once your last coat is done, close the door and leave the bathroom alone for a couple of days. We didn’t go on the floors for a full 48 hours after the final coat to allow for them to really seal and have a good outcome.

Price Breakdown:
Overall this was not a super difficult process, and I totally think anyone can follow this tutorial on how to paint tile floors! We personally owned a few of the supplies before starting, but over all my bathroom took me roughly 2 weeks from start to finish.
The floors cost me roughly $70 in supplies. I don’t think for a finished solution as pretty as this that I can complain a bit about that!
Other Posts You’ll Love
If you want to see another great way paint can transform your bathroom, be sure to check out this blog post on how we painted our bathroom cabinets a couple of years ago. They still look just this great over time.
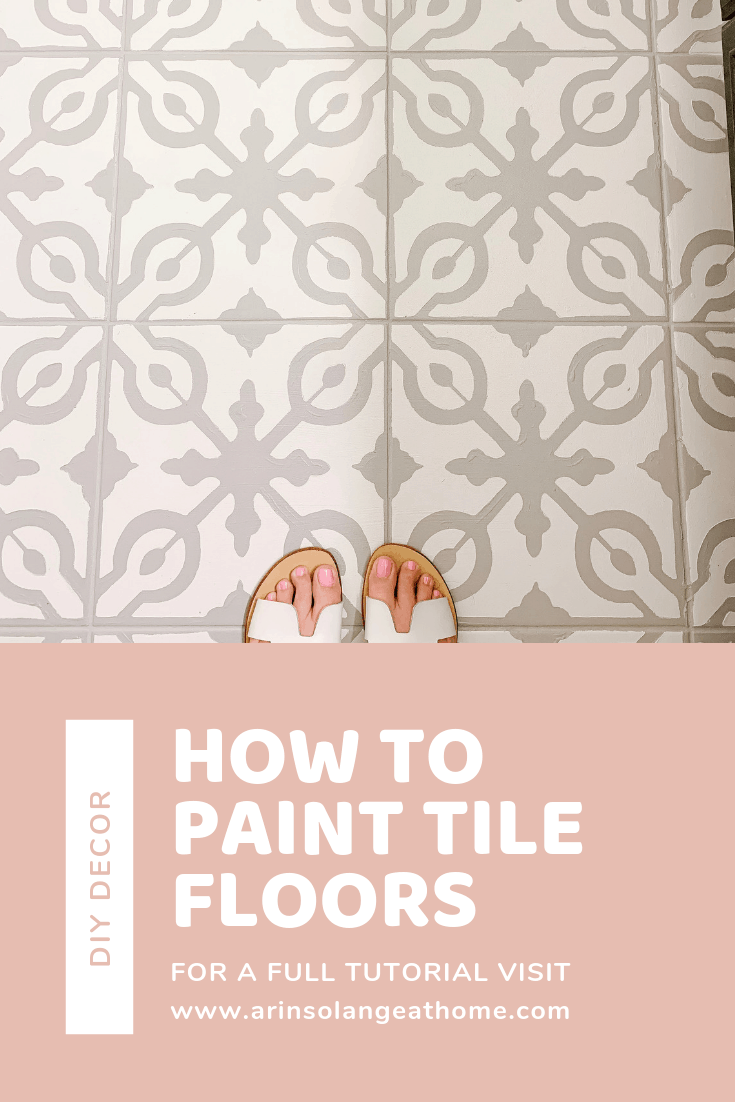
Pin The Post Below For Later
Hopefully you feel confident and inspired to take on a tile painting project of your own. Be sure to pin the image below to find this later, and if you have any questions leave them in the comments below, or DM on Instagram (@arinsolange).
Omg I love this idea
I cannot believe how amazing this turned out! Totally having you do this to my next house ????????
you’re lucky I might love you enough. MIGHT.
Beautiful ! Can my stencil be larger than my tile ?
other people have done this where they don’t copy the size of the tile. I personally did, but it is not something you have to do!
I have a question,if I did this in a rental and wanted to move out,can I reverse the process? Or is this permanent?
Hi!! I am not sure if you would be able to. I am assuming its sort of permanent!
I am obsessed with this stencil! It looks like its not on etsy anymore :(. Any idea where I might be able to find it??
Oh No!! Let me see what I can find!
I used Cutting Edge Stencils for a project I had in my kitchen. They are very good quality stencils. I plan to order a different design to do this project on my bathroom floor. Thanks for the tips!!!
Back in the 80’s when we were doing stencil borders on walls, we used spray adhesive on the back of the stencil to keep it flat. (spray back and let dry for a minute so it stays on stencil. Can be washed off periodically to start clean. Wondering if no one is doing that with floors?
Susie – you could certainly try it!
Is this a ceramic or vinyl tile floor?
Ceramic tile
Also looking for this! Is there a shop name you could share?
Hi Kayla,
What kind of shop are you looking for? I am happy to check something out. I think Darlene was asking if the original floor was vinyl or tile.
Great job ! It is one thing to start a project but a different level to complete it so beautifully . Just terrific
Oh my gosh that is so sweet! Thank you!
How is this holding up now that’s it a few months in. Does the paint chip off the tile any?
Hi! It is holding up super well. So far we have no chips or areas that are failing. It is not a bathroom that gets a lot of really wet floors (my kids shower in our bathroom) so I can’t attest to that, but as far as normal wear, it’s doing great!
Arin
Good article with great tips. It seems that this would definitely be a DIY project, considering the amount of labor involved. If you had paid a professional to do this, it would end up being less expensive to just have a contractor replace the tile. I’m going to do this project in our laundry room. Thanks!
Hello! I love what you’ve done. I am considering do this for both of my bathrooms. Did you have any paint left over?
Thank you!
I did!! I think pending the size of the bathroom you could likely do 2 with the paint posted!
So happy I found your tutorial! I hate our tile and want a change. Now I just need to convince my husband. Wish me luck! 😉
You got this!! I would love to see your end result if you do it!! If you Instagram my handle is @arinsolange!
I have a cricut and can only cut 11.5″ wide! My tiles are 12″. 🙁 Can the silhouette go there full 12? Trying to figure out how to do this!!
Hi Kayla,
Oh no!! The max size on a silhouette is 12 inches. You can cut all the way to the edges, so it might work via a silhouette. If not I would maybe go with an ETSY option. I personally don’t think I saved much money cutting them myself because of materials.
So happy I found this!! I’m looking for that stencil shape, do you have any links to it on Etsy? The one listed above isn’t active anymore.
Amy,
I am updating the link – thank you so much for letting me know. Here is the link to the shop
https://rstyle.me/+GWTRcXppKftNWfnbptT2cQ
Love this! What type of material do you cut the stencil on? I looked for the tutorial on how to cut the stencil, but couldn’t find it. I have a cricut, not a silhouette. Can’t wait to do this!!!
Hi! You can buy stencil material then just put it in your cricut similar to vinyl.
https://rstyle.me/+rnY0ag97w3rPlFsJ7Atoqg
Beautiful!! Thank you for your detailed instructions. I am so exciting to try this myself. Quick question – In the Tips you mentioned rolling over the stencil with the base color before the accent color, is this to help the stencil stay in place? Thanks!
Yes! also if you do that, the hope is that the paint that would creep under the stencil would be the base color – I am working on doing something similar to my back patio and am going to try the theory!
When painting that base color over the stencil, how much do you need to let it dry before putting the white on top?
I would let it dry the full time the can says – probably at least a few hours!
Hi and thank you so much for the great detail! I’m about to tackle this project myself. Same question, just more clarification Christina above. Regarding rolling over stencil do you mean: place the stencil. tape it down. roll over with base color and (here’s the question) *let it dry*, then add the stencil color? I assume let it dry so the colors don’t run together …
Thanks so much!
Yes, thank you for clarifying. So yep – let that base coat over the stencil FULLY dry. The first coat of the stencil really tacks it down, so letting it fully dry with your base color should prevent as much bleeding from your top color going under
I know u were asked this in November, but any chipping yet. I’m thinking about doing this since we have all this tine from social distancing.
Hi Kristal, they are still holding up great 🙂
I painted my laundry room tile and sealed it with the polyurethan. My washer leaked and got the floor wet and the paint bubbled and came off. Is there something you use to waterproof the paint
Oh no!! I am so sorry to hear that. I only sealed with the poly. did you do several coats?
I would also love to know if they are still holding up! Thanks so much for a great step by step guide.
Hi Jane – we are over a year in on the floors and still no flaws!
Hi Arin, was wondering about the surface being slippery. Have always hated my bathroom tile floor. Will this make it more or less slippery. Live your finished product.
Hi Jenny – That is a great question. I did not notice it being any more slippery than the tile that was below it!
Ok….one more time! You said you would paint the 1st stencil coat with your base coat….grey? So you paint the entire floor with grey, place the stencil in place and paint a grey coat and then your second color?
Hi – yes, so what I would do is paint your floor grey per the way I did it. Then when you lay down your stencil do another coat of grey. Let that fully dry, and DO NOT LIFT. Then paint over it again with the white. I just told a follower on Instagram to try that this past week and she said it was night and day!
Hello!! I know this is an older post but I’m wanting to do this in our master bath! Our tile is not smooth it’s got a little bit of texture to it. Do you think this would still work or do you think the bumps would make it difficult to lay the stencil?
Hi Allison – I wonder if you should do a painters tape pattern instead of stencil. I do think the bumpy floor could make a stencil tricky, but you could do a really SIMPLE pattern like triangles or something so that if you have to touch up you can more easily do that.
Hi! In the midst of a similar project currently. I have been debating on what to use to seal my floor and have the matte water-based version of what you used on yours. The base of my tile is white and I know yours is grey but I’m just curious if you had any issues with the top coat yellowing. The only time I’ve used the coating has been over dark colors so I couldn’t see any yellowing but I have had that issue before with other top coats. Thanks for your time!
Hi Karie,
The big thing is to use a WATER based which it sounds like you have. The yellowing would come from using an oil based sealer.
Good luck on the floors!
Hi there, so could you just paint the tiles and not do a stencil? would the paint hold up over time? Also where would I find the step by step to the painting of your bathroom cabinets? I check the other post but didn’t see a step by step? Thank you!
Hi Shayan,
You definitely can go with one single color! And my apologies – let me update the blog post, but here is a great step by step post. https://arinsolangeathome.com/painting-kitchen-cabinets-white/?swcfpc=1!
Thank you- it turned out great with your tips!!! One thing I did that really helped? Instead of painting the base coat on first over the stencil I instead put a thin layer of mod podge over, let it dry and then painted the white. It was a game changer because it helps to seal the edges so the paint doesn’t seep under.
Oh that is a great tip! Thank you for sharing!!
Hello, what color white did you use?
Hi Kristin,
The two paints in the photos are the ones I used.
You are genius.
You are so kind!
So, I’m assuming its been almost 2 years since you did this… how are the floors doing? Still holding up?
Hi Lynn – we moved out of this house last August, however at that time it was still perfect!
Since you made the stencil, would you mind sharing the .svg file with me so I can also cut it out?
Hi Alicia – I linked to the SVG file I bought on etsy in the post. I purchased this then cut it myself. – https://rstyle.me/+GWTRcXppKftNWfnbptT2cQ
Being a gal that works at a big box store paint department for years, everything you have done is on spot except one. The water base poly sealer should be for floors. It will last longer and hold up better if it’s a bathroom that is used and cleaned more often. You dont walk on your furniture and the poly that you are using is for furniture. Your floor looks great and I like all of your ideas for the stencils. Hope this helps.
That is super helpful! Thank you so much!
Do you recommend priming the floors or was the Rustoleum Chalked paint two coats enough? My current tile has a little design on them already.
Hi Brianna – I honestly think you are fine without priming them. It was a fairly heavy coverage.